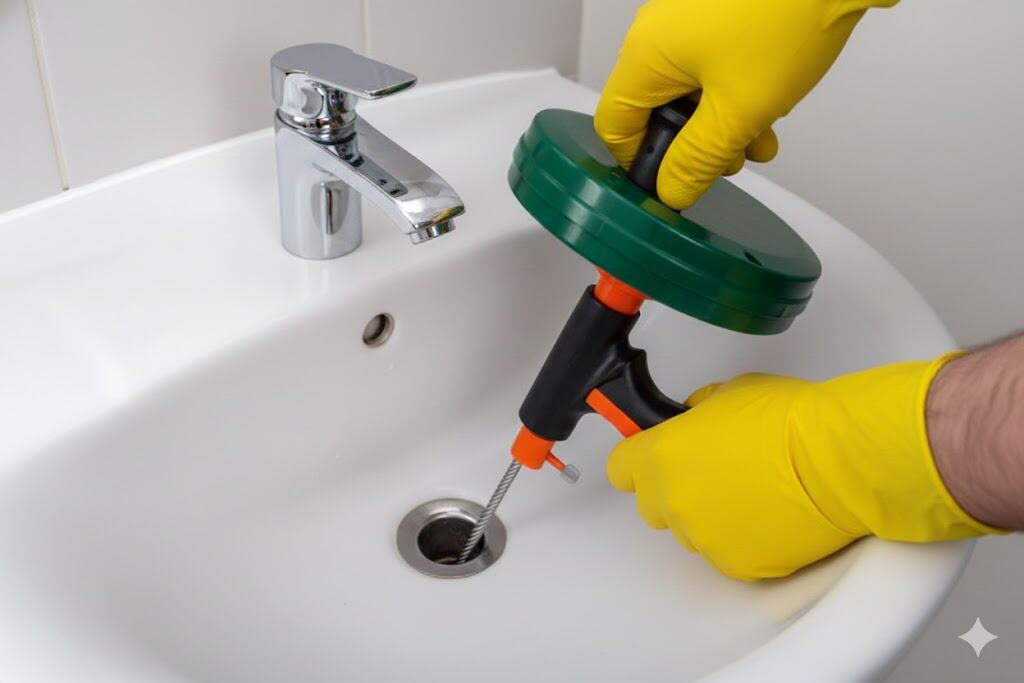
by RSP Crew | Jun 7, 2025
Turning on the tap and seeing brown water is never a pleasant surprise. For many Australians, this can be an unsettling experience, raising questions about safety, causes, and what steps to take next. Whether it’s a one-off event or a recurring issue, understanding why your tap water is brown can help you decide what to do and when to call in the experts.
Introduction: Understanding Discoloured Water
Discoloured water is a common concern for many Australian homeowners, but understanding the reasons behind it can help you address the issue quickly and effectively. While Australia is known for its high standards of drinking water, occasional water discolouration can still occur—most often as an isolated problem within a single property rather than a widespread issue with the local water supply.
The most frequent causes of discoloured water include issues with internal pipes, sediment build-up in water pipes, or rusted sections of your property’s plumbing. Over time, sediment can accumulate in pipes, and if disturbed, it may cause your tap water to appear brown or cloudy. Internal plumbing problems, such as corroded pipes or old fittings, can also lead to water discolouration. Identifying whether the problem stems from your internal pipes or the broader water supply is crucial for finding the best solution and ensuring your drinking water remains safe. Regular maintenance of your property’s pipes and plumbing system is one of the most effective ways to prevent discoloured water and protect your water quality.
Types of Discoloured Water
Discoloured tap water can show up in several different ways, each with its own likely cause. Brown tap water is one of the most common types and is usually the result of rust or iron particles entering the water supply, often from older pipes or after maintenance work. Yellow or orange water can also be caused by iron or manganese, which may be present in the water supply or released from pipes as they age.
Cloudy or milky water, on the other hand, is typically due to harmless air bubbles trapped in the water. This can happen after maintenance work on the water network, such as pipe repairs or fire hydrant testing, which introduces air into the pipes. When you fill a clear glass with this water, you’ll often see the cloudiness clear from the bottom up as the air bubbles rise and escape. While this type of discolouration is usually not a health concern, it can be unsettling to see.
In some cases, cloudy water may be linked to corroding copper pipes, which can be a more complex issue requiring the expertise of a licensed plumber. If you notice persistent cloudy water, especially if it’s accompanied by a blue or green tint, it’s important to seek professional advice to improve your water quality and prevent further damage to your pipes.
By recognising the different types of discoloured water—whether it’s brown, yellow, orange, cloudy, or milky—you can better identify the underlying cause and take the right steps to resolve the issue, ensuring your tap water remains safe and clear.
Is Brown Tap Water Dangerous?
Brown water usually looks alarming, but it’s not always a health risk. In Australia, water safety is regulated by the Australian Drinking Water Guidelines, which set the standards for safe and clean drinking water. The most common cause is rust or sediment stirred up in the pipes, which can make the water look dirty but isn’t necessarily harmful. Still, drinking or cooking with discoloured water is not recommended until you know the cause. Many homeowners have concerns about the safety and quality of their tap water, but following the Australian Drinking Water Guidelines helps ensure that any risks are minimized. According to the Water Corporation, brown water is generally safe for bathing and cleaning, but it’s best to avoid using it for drinking or food preparation until it runs clear.
Common Causes of Brown Water in Australia
If you notice brown water coming from your taps, it can be alarming and may indicate several underlying issues. Water may turn brown for a variety of reasons, often related to your home’s plumbing or the local water supply. Here are the most frequent culprits in Australian homes:
Rust and Corrosion in Pipes
Older properties often have galvanised iron or steel pipes, which can rust over time. When water sits in these pipes or flows at high speed, rust particles can break free and mix with your tap water, giving it a brown or reddish tint.
Replacing rusted pipes with modern materials can help improve water quality.
Water Mains Disturbances
Work on water mains—like repairs, upgrades, or even a burst main—can disturb sediment that’s settled in the pipes. This sediment, often made up of harmless minerals and iron, can flow into your home, especially after the water has been turned off and back on. Disturbed sediment may be flushed out through your taps, sometimes causing temporary discoloration of the water.
Plumbing Works or Repairs
Recent plumbing work in your house or street can disturb pipes and loosen rust or sediment, leading to temporary brown water.
If brown water continues after plumbing work, a licensed plumber can provide advice on whether further action is needed.
Sediment Build-up
Sediment naturally builds up in water pipes over time. If water flow increases suddenly (for example, after a fire hydrant is used), this sediment can be pushed through to your taps.
Local Water Supply Issues
Heavy rain, drought, or changes at the water treatment plant can all affect water quality. Sometimes, these changes can lead to temporary discolouration. After heavy rain, organic matter such as decayed leaves or other biological material can enter the water supply and cause discoloration.
What to Do if You Notice Brown Water
Spotting brown water can be stressful, but there are some simple steps to follow:
- Run the cold taps and cold water for a few minutes. Use the tap closest to where the water enters your home (usually the front garden tap). This can help flush out any sediment or air bubbles.
- Check if it’s just one tap or the whole house. Test both the hot tap and hot water taps as well as the cold taps. If only one tap is affected, the issue is likely with your internal plumbing. If all taps have brown water, it’s probably a mains or supply issue.
- Avoid using hot water. Don’t run hot taps or use appliances like dishwashers or washing machines with brown water, as this can draw sediment into your hot water service and may require servicing.
- Fill an open container with water and let it stand for a few minutes. Observe if the water clears or if bubbles clear at the bottom. If the water becomes clear, it may just be aerated water, which is harmless. If sediment settles or the water remains discoloured, further action may be needed.
- Don’t drink or cook with the water. Wait until it runs clear.
- Observe the water coming from the tap. If the water coming out remains discoloured after these steps, seek help.
- Contact your local water provider if the problem doesn’t clear after a few minutes or if you notice a sudden, severe change in water colour.
If you’re in a rental property, let your landlord or property manager know straight away.
If you are concerned about your water quality or need further advice, contact a professional.
When to Call a Plumber
Some brown water problems can be traced to your home’s plumbing. Call a licensed plumber if:
- Only one or a few taps are affected
- The water is brown every morning or after long periods of not using the tap
- There’s a sudden drop in water pressure along with discolouration
- You see leaks or damp patches near pipes
A plumber can inspect your pipes for corrosion, leaks, or build-up and recommend repairs or replacements as needed.
When to Contact Your Water Provider
If all taps in your house show brown water, or if your neighbours have the same issue, the problem is likely with the water supply. Your water provider can give updates on any known issues or maintenance in your area. Most providers have a 24/7 faults line and online updates for water quality incidents.
Common Causes and What to Do
Cause | Signs | What to Do |
Rusty house pipes | Only some taps affected, older home | Call a plumber for inspection |
Water mains disturbance | All taps affected, neighbours have same issue | Contact water provider, run tap |
Recent plumbing work | Issue started after repairs | Flush taps, call plumber if ongoing |
Sediment build-up | Brown water after high water use nearby | Run tap for several minutes |
Local water supply changes | After storms or drought, all taps affected | Contact water provider |
How to Prevent Brown Water
Preventing brown water starts with regular maintenance and keeping an eye on your plumbing:
- Replace old galvanised or steel pipes with copper or plastic alternatives, which are less prone to rust.
- Book regular plumbing inspections to catch corrosion or leaks early.
- Install a whole-house water filter to catch sediment before it reaches your taps.
- Flush your taps regularly if you live in an area with older infrastructure.
Frequently Asked Questions
Is brown tap water safe to drink?
Usually, brown water is caused by iron or sediment and isn’t harmful, but it’s best to avoid drinking it until the water runs clear.
How long should I run the tap to clear brown water?
A few minutes is usually enough. If the water doesn’t clear after 10 minutes, contact your water provider.
Can brown water stain clothes or appliances?
Yes, iron and sediment can stain laundry and build up in appliances. Wait until the water is clear before using washing machines or dishwashers.
How common is brown water in Australia?
Incidents are relatively rare, but they do occur, especially after water mains work or in areas with older pipes. According to Sydney Water, less than 1% of customers report discoloured water each year.
Key Takeaways
- Brown tap water is usually caused by rust, sediment or disturbances in the water supply.
- It’s best to avoid drinking or cooking with brown water until it runs clear.
- Run your cold tap for a few minutes to flush out sediment.
- If only one tap is affected, call a plumber; if all taps are affected, contact your water provider.
- Regular maintenance and replacing old pipes can help prevent brown water.
- Brown water is rarely dangerous but can stain laundry and appliances.
If you’re unsure or the problem persists, don’t hesitate to reach out to our team or your local water provider for peace of mind. For more information on water quality and safety, visit the Australian Government’s Health Direct or your local water authority’s website.
by RSP Crew | May 1, 2025
If you’re dealing with low hot water pressure at home, you’re not alone. Many Aussies face this problem, making everyday tasks like showering or washing dishes a hassle. Several things can cause low hot water pressure, like sediment in your system or corroded pipes.
Knowing why you have low hot water pressure is key to fixing it. In this article we’ll look at common causes and solutions. Knowing what’s going wrong helps you get back to hot water at home.
What’s Causing Low Hot Water Pressure
When you notice low hot water pressure, finding the cause is key. This saves you time and money on the wrong fixes. It also ensures you get the right solution.
Homeowners can often spot common causes by looking for symptoms and doing simple tests. These include:
- Sediment in the hot water tank
- A faulty or old hot water pressure regulator
- Partially closed or leaking water supply valves
- Corroded or clogged pipes restricting water flow
- Malfunctioning or incompatible shower heads and faucets
To figure out what’s causing your low hot water pressure try these steps:
Symptom | Potential Cause | Diagnostic Check |
Low hot water pressure throughout the house | Sediment buildup, faulty pressure regulator, or partially closed main supply valve | Check the water heater for sediment, test the pressure regulator, and ensure the main supply valve is fully open |
Low hot water pressure in specific fixtures | Clogged pipes, malfunctioning shower heads or faucets | Check for visible corrosion or leaks, clean shower heads and faucet aerators |
Fluctuating hot water pressure | Leaking supply valves or corroded pipes | Inspect supply valves and exposed pipes for leaks or corrosion |
Many homeowners can fix some hot water pressure problems themselves. But if you’re not sure or unsure it’s best to call Rapid Service Plumbing. A licensed plumber can find the real problem and recommend the best fix to get your hot water flowing again.
Sediment in Hot Water Systems
Low hot water pressure often comes from sediment in the tank. Minerals like calcium and magnesium build up and block water flow and pressure.
In areas with hard water sediment builds up faster. When heated these minerals settle at the bottom of the tank. If not cleaned this can damage water pressure. Sediment builds up slowly but surely. As water heats up minerals separate and settle. Over time this layer grows and takes up space and reduces water storage.
Signs of Sediment Buildup Affecting Water Pressure
Look out for these signs of sediment buildup:
- Reduced water flow from hot water taps and showers
- Longer wait times for hot water to reach fixtures
- Rumbling or popping noises coming from the hot water tank
- Inconsistent water temperature or sudden temperature changes
Flushing the Hot Water Tank to Remove Sediment
To fix low pressure, flush your tank regularly. Here’s how:
- Turn off the power or gas to your hot water tank.
- Attach a garden hose to the drain valve at the bottom of the tank.
- Run the other end of the hose to a drain or outside, away from your home.
- Open the drain valve and let the tank empty, flushing out sediment.
- Close the drain valve and refill the tank with fresh water.
- Restore power or gas to the tank and let it reheat the water.
Flushing your tank removes sediment and keeps water pressure high. Regular maintenance prevents buildup and keeps your system working well.
Faulty or Old Hot Water Pressure Regulator
A hot water pressure regulator is key to keeping water pressure steady in your home. Over time these regulators can fail or wear out and cause pressure to drop. If you’ve seen a sudden pressure drop it’s time to check your regulator.
To see if the regulator is the problem, do a simple test. Find the regulator near the main water line. Look at the pressure gauge. If it’s not between 50-60 psi it’s off and needs adjusting or replacing.
Adjusting a hot water pressure regulator is easy. Most have an adjustment screw. Turn it clockwise to increase pressure or counterclockwise to decrease. Make small changes and check the gauge until it’s right.
If adjusting doesn’t fix it you might need a new regulator. They usually last 7-12 years. If yours is getting old it’s time for a new one to get your pressure back up.
Partially Closed or Leaking Water Supply Valves
When you have low hot water pressure, check your water supply valves. If these valves are not fully open or leaking, it will reduce hot water flow. This means lower pressure at your taps and showers.
Where is the Main Water Supply Valve
Find your home’s main water shutoff valve first. This valve controls water flow to your whole plumbing system. In many Australian homes you can find it in these spots:
- Near the water meter, often in a box or pit near the street
- In the basement or crawl space, where the water line enters the home
- Near the hot water system or tank
Check for Partially Closed Valves
After finding the main valve, make sure it’s fully open. A valve that’s not fully open will limit water flow and cause low hot water pressure. Also check other water supply valves near your hot water system and around your home. Make sure they are fully open too.
Leaks in Water Supply Valves
Leaks in water supply valves can also cause low hot water pressure. Look for:
- Visible water droplets or puddles near the valve
- Corrosion or mineral buildup around the valve stem
- Hissing or dripping sounds coming from the valve
If you see leaking valves, get them fixed or replaced by a licensed plumber. This will restore hot water pressure and prevent water damage to your home.
Corroded or Clogged Pipes Restricting Water Flow
Low hot water pressure might be due to corroded or clogged pipes. These issues can slow down water flow and cause pressure problems. Let’s see how these problems occur and what you can do to fix them.
Signs of Corroded Pipes Affecting Water Pressure
Pipe corrosion happens slowly and can affect your hot water pressure. Look out for:
- Discolored water with a reddish or brownish tint
- Visible rust on exposed pipes* Metallic taste or smell in the water
- Frequent leaks or ruptures in the plumbing system
If you see any of these signs, act fast. Corroded pipes not only lower water pressure but can also make your water unsafe. They can contain harmful substances like lead and copper.
Clogs in Pipes Reduce Hot Water Pressure
Clogged pipes are another reason for low hot water pressure. Over time, things like mineral buildup and debris can block the pipes. This restricts water flow. Factors that can cause blockages include:
Causes
- Hard water
- Water with high mineral content can leave deposits in pipes
- Corrosion
- Corroded pipes can flake off and create blockages
- Foreign objects
- Small items like hair, soap, or debris can get stuck in pipes
Try a plumber’s snake or a chemical drain cleaner to fix clogged pipes. But if the problem is serious, call a plumber. They can safely and effectively clear the blockage.
By watching for signs of corrosion and blockages, you can catch problems early. This way, you can keep your hot water pressure at its best.
Faulty or Incompatible Shower Heads and Faucets
When you have low hot water pressure, think about your shower heads and faucets. Sometimes the problem is with these fixtures. Low-flow shower heads and water-saving faucets can cut down the water flow too much, making showers less enjoyable.
Check your shower head for wear, damage or mineral buildup. A clogged or corroded shower head can really lower water pressure. Try cleaning it with a mix of white vinegar and water. Let it soak for a few hours before rinsing well.
Sometimes you might need a new shower head. Choose one that fits your home’s water pressure and plumbing. Look for a shower head with adjustable settings to control flow without losing pressure. Remember, while low-flow shower heads save water, they might not be best if your home already has low water pressure.
Water-saving faucets in sinks and tubs can also lower hot water pressure. If you’ve put in new faucets and noticed lower pressure, check if they match your plumbing system. Sometimes swapping out fixtures for ones that fit your home’s water pressure needs can help a lot.Replacing malfunctioning or incompatible shower heads and faucets can boost hot water pressure. But if replacing them doesn’t fix the problem, look for other causes. These could be sediment buildup, faulty pressure regulators or leaks in your plumbing system.
Troubleshooting low hot water pressure Issues
Low hot water pressure can be really frustrating. But there are steps you can take to fix it yourself. Before you call a plumber, try these DIY fixes to boost your hot water pressure.
DIY Methods for Increasing Hot Water Pressure
First, clean your shower heads and faucet aerators. Mineral buildup can slow down water flow. Soak the shower head or aerator in white vinegar and water for hours. Then, use an old toothbrush to scrub off any dirt before putting it back on.
Next, look for leaks in your plumbing. Even small leaks can lower water pressure a lot. Check pipes, valves and connections for moisture or drips. If you spot a leak, tighten the connection or replace damaged parts.
If your home has a pressure regulator, you might be able to adjust it. Find the regulator near the main water valve. Turn the adjustment screw a bit clockwise to increase pressure. But be careful not to overdo it, as it could harm your plumbing.
When to Call Rapid Service Plumbing for Low Water Pressure
If these DIY fixes don’t work, it’s time to call a plumber. Problems like corroded pipes or a faulty water heater need a pro’s touch.
Also, if you’re not sure how to fix the issue or it’s a complex problem, Contact us. We can find the real cause and fix it properly, getting your hot water back to normal.
Maintaining Optimal Hot Water Pressure in Your Home
To keep your hot water flowing well, regular maintenance is key. It helps prevent low water pressure issues. This way, you won’t face weak water flow when you need it most.
Check your pipes often for leaks or corrosion. A small leak can lower water pressure over time. Also, clean your hot water tank yearly to stop sediment buildup. This can block water flow and cause pressure issues.
If you notice your water pressure dropping, act fast. A weak shower spray or slow sinks are signs of a problem. Fixing it early can save you from bigger issues and expensive repairs later.
FAQ
What are the most common causes of low hot water pressure?
Low hot water pressure can be caused by many things. Sediment in the tank, faulty pressure regulator, and closed valves are common offenders. Corroded or clogged pipes and bad shower heads also play a role.
How do I know if sediment buildup is affecting my hot water pressure?
Sediment buildup shows up as a drop in pressure over time. You may also see discolored water or hear strange noises from the tank.
What if I suspect a faulty hot water pressure regulator?
First, check the regulator for damage or leaks. Try adjusting it to see if that helps. If not, a plumber should take a look.
Can partially closed water supply valves cause low hot water pressure?
Yes, closed valves can reduce water flow. Make sure all valves are fully open. Fix any leaks to avoid more problems.
How do I know if corroded pipes are affecting my hot water pressure?
Corroded pipes show up as discolored water and visible rust. A drop in pressure is another sign. A plumber can assess and fix the damage.
Can installing water-saving shower heads and faucets cause low hot water pressure?
Some water-saving fixtures may limit flow too much. Choose ones that still allow good pressure. If pressure drops after installing new fixtures, consider changing them.
What are some DIY methods for increasing hot water pressure?
Clean shower heads and aerators to remove buildup. Fix leaks and flush the tank to clear sediment. Adjust the regulator if you can. But if these don’t work, a plumber is needed.
How often should I flush my hot water tank to maintain optimal pressure?
Flush your tank at least once a year to keep pressure up. More often if you have hard water or see sediment. Check your tank’s manual or ask a plumber for advice.
Key Takeaways
- Low hot water pressure can be caused by sediment buildup, faulty regulators, partially closed valves, corroded pipes, or incompatible fixtures
- Regular maintenance, like flushing your hot water tank, can prevent low hot water pressure issues
- Finding leaks, clogs, and corrosion in your plumbing system is key to maintaining optimal water pressure
- Upgrading to water-efficient shower heads and faucets can improve hot water pressure while saving water – if not call us now!
by RSP Crew | Mar 5, 2025
Ever found yourself with a clogged toilet and no plunger? You’re not alone. Many Aussies face this problem, looking for ways to fix it without a plunger.
But there’s good news. You can unclog a toilet with items you likely have at home. We’ll show you how to deal with a stubborn blockage. No more panic, just practical fixes!
What Causes a Clogged Toilet?
Before you try to unclog a toilet without a plunger, you need to know why it’s clogged. Knowing the cause helps you pick the best way to fix a badly clogged toilet. This way you can drain the toilet without a plunger properly.
Using too much toilet paper is a common cause of clogs. Even though toilet paper is meant to dissolve, too much can get stuck. Try to use less paper and flush in smaller amounts if you need to.
Foreign objects like toys or phones can also block your toilet. These items can get stuck in the drain, stopping water from flowing. To prevent this, keep the toilet lid closed and teach your family what can be flushed.
A badly clogged toilet can lead to overflow and mess, making it crucial to take preventative measures. Regular maintenance and mindful flushing habits can help avoid severe clogs.
Sometimes a faulty flush system might be the problem. Issues with the flapper or fill valve can stop the toilet from flushing right. If you think this is the case, it’s best to call a plumber to fix it.
Knowing why your toilet is clogged is the first step to unclogging it without a plunger. By knowing the cause you can choose the right method to fix it. This will get your toilet working again.
Tools and Materials Needed
Before you start to unclog your toilet without a plunger, you need the right tools and materials. These will help you do the job well and keep you safe from any mess. Let’s take a look at what you’ll need.
Rubber Gloves and Old Towels
First get a pair of rubber gloves. They will protect your hands from harmful bacteria or debris. Also have some old towels ready to clean up any spills or drips.
Bucket and Disposable Cups
You’ll need a bucket and disposable cups to unclog the toilet. Use them to move water from the sink or bathtub to the toilet bowl. This will help break up the blockage. Make sure the bucket is clean and the cups can handle hot water.
Drain Snake or Coat Hanger
For unclogging, a drain snake or a straightened coat hanger is very helpful. These will allow you to reach deep into the drain and remove the blockage. Be careful not to damage the toilet or the drain pipe.
Having these tools and materials ready, including a wire coat hanger, will help you tackle the clog properly. Remember, preparation is key when unclogging a toilet without a plunger.
The Hot Water Method
Wondering how to unclog a toilet without a plunger? The hot water trick is simple and works. Pour hot water into the toilet bowl to break up and dissolve the blockage.
Boiling Water Carefully
First boil water on the stove. While waiting remove some water from the toilet if it’s full. Once boiling carry the pot to the bathroom carefully.
Pouring Technique and Precautions
Stand back from the toilet and slowly pour the boiling water into the bowl. Aim for the drain hole and keep the stream steady. Be careful not to splash the hot water, it can burn you.
Wait a few minutes to see if the water level drops. This means the blockage is clearing. If the water drains slowly you may need to repeat the process a couple of times.
Remember this method is effective but requires caution. Use oven mitts or gloves to protect your hands. Don’t splash the water on yourself or surfaces that could get damaged by heat.

DIY Plunger Alternative
Don’t worry if you don’t have a plunger. There are easy DIY fixes to unclog your toilet. You can make a plunger from things you have at home.
First use a plastic bottle with a narrow neck, like a water or soft drink bottle. Take off the cap and drain any liquid. Then wear rubber gloves and fill the bottle with warm water. Put your thumb over the top and push the water into the bowl, aiming at the drain.
The water pressure should push out the blockage, like a plunger. If it doesn’t work the first time try again a few times. Make sure to fill the bottle with more warm water each time.
You can also use a toilet brush as a plunger. Just push the brush into the drain and move it up and down hard. The bristles will help break up the blockage. Remember to wear gloves and clean the brush well after.These DIY fixes might not work for tough clogs. If they don’t help you’ll need to try other ways to unclog your toilet without a plunger.
Baking Soda and Vinegar Method
Wondering how to unclog a toilet without a plunger? Try using baking soda and vinegar. It’s a simple way to clear the clog and get your toilet working again.
Alternatively, you can use Epsom salt, which is effective due to its chemical properties that help break down stubborn debris.
Mixing the Ingredients
Start by pouring a cup of baking soda into the toilet bowl. Then add a cup of white vinegar slowly. Be careful as the mixture will fizz and bubble.
Waiting for the Reaction
After adding both let the mixture sit for about 20 minutes. The baking soda and vinegar will break down the clog making it flushable.
“The combination of baking soda and vinegar is a tried-and-true method for unclogging toilets without a plunger. The chemical reaction helps to dissolve the blockage making it easier to flush away.”
Flushing and Repeating if Necessary
After 20 minutes flush the toilet to see if it’s clear. If it’s still slow or clogged repeat the process. Add more baking soda and vinegar wait 20 minutes and flush again.
This method is a simple and effective way to unclog a toilet without a plunger. Keep baking soda and vinegar on hand for quick fixes.
Drain Snake or Wire Hanger
When your toilet drain gets clogged and you don’t have a plunger, a drain snake or a wire hanger can help. These tools will let you remove the blockage manually. This way your toilet will work like new again. Here’s how to do it.
Start by preparing your drain snake or a straightened wire hanger. Make sure it’s smooth and won’t scratch the toilet. Carefully push the tool into the toilet bowl, go as far down as you can.
Don’t push too hard as it might harm the toilet’s inside. Once it’s in, wiggle and rotate the tool to break up the clog. You’ll feel resistance when you hit the blockage. Keep working it until the clog is dislodged.
As you work, you’ll see the water level in the bowl drop. This means you’re making progress. After a few minutes, remove the tool from the toilet. If you’ve broken up the clog, the debris should come out with it. Throw away any debris and clean the tool for next time. Then flush the toilet to see if the clog is gone. If the water flows well, you’ve done it! If not, try again or look at other methods in this guide.
How to Unclog a Toilet Without a Plunger Using Dish Soap
Don’t worry if you don’t have a plunger for a clogged toilet. You can use dish soap to fix it. Dish soap makes the blockage slide through the drain easily.
Squirt Dish Soap into the Bowl
To unclog your toilet without a plunger follow these steps:
- Grab a bottle of liquid dish soap from your kitchen.
- Squirt about half a cup of dish soap into the toilet bowl.
- Make sure to squirt it towards the drain hole.
Let the Soap Do Its Job
Now let the dish soap do its job. It will slowly seep into the blockage. For best results:
- Let the dish soap sit in the toilet bowl for 15-20 minutes.
- Don’t flush the toilet during this time to avoid overflow.
- If the clog is tough you might need to repeat the process or wait longer.
After the dish soap has worked test if the clog is gone. Flush the toilet and see if the water drains well. If not you might need to try again or use another method.
Method Time Required Success Rate Dish Soap 15-20 minutes 70-80% Hot Water 10-15 minutes 60-70% Baking Soda & Vinegar 30-60 minutes 50-60%
By using dish soap you can unclog your toilet without a plunger. It’s a handy trick when you’re in a tight spot and can’t find a plunger.

Preventing Future Clogs
Now you know how to unclog a toilet without a plunger. It’s key to prevent future clogs. Simple habits and regular maintenance can keep your toilet flowing well. This way you avoid the trouble of a blocked toilet.
Proper Toilet Paper Usage
Excessive or improper toilet paper use often causes clogs. Be careful with how much you use and avoid flushing big wads. Here are some tips for using toilet paper right:
- Use only as much toilet paper as necessary
- Fold the toilet paper instead of wadding it up
- Flush in stages if you need to use a lot of toilet paper* Consider using septic-safe or biodegradable toilet paper if you have a septic system
Don’t Flush Inappropriate Items
Flushing items that shouldn’t be flushed is another big cause of clogs. Many “flushable” products can still cause problems. Avoid clogs by not flushing these items:
Item Reason Wet wipes, baby wipes, makeup wipes Don’t break down like toilet paper Feminine hygiene products Expand with moisture and cause clogs Cotton balls, swabs, pads Don’t dissolve and accumulate in pipes Dental floss Can tangle and create net that traps debris Paper towels, tissues Too thick and not designed to break down
Regular Maintenance and Cleaning
Being mindful of what you flush is important to prevent toilet clogs. Regular toilet maintenance also helps prevent clogs. Here are some simple tips:
- Clean your toilet regularly with a brush and cleaner
- Flush the toilet after each use to prevent buildup
- Check for leaks or running water and repair promptly
- Schedule professional inspections annually
By following these tips you can reduce the chance of a clogged toilet greatly. If you need to unclog your toilet without a plunger, the methods in this guide will help you unblock even a badly blocked toilet fast.
When to Call a Professional Plumber
Knowing how to unclog a toilet without a plunger when the water is high is useful. But, there are times when you should call an emergency plumber for a severe toilet clog. If you’ve tried many ways to unblock a badly blocked toilet without a plunger and it still won’t budge, it might be a bigger problem.
Deeper blockages in the main sewer line need special tools and skills. Also, if water backs up in other drains or toilets, it’s a sign of a bigger issue.
Trying to unclog a toilet without a plunger when the water is high can be risky. If you’re not sure what to do you might damage your toilet or plumbing system.
It’s safer to call a licensed plumber in these situations. They can fix the problem without causing more damage. While it might cost more it can save you from bigger expenses later and keep your plumbing working well.
Unclog a toilet without a plunger might seem hard but it’s possible with the right tools and methods. You can try using hot water and dish soap or make a DIY plunger from a plastic bottle. Remember it might take a few tries to clear the blockage.
To avoid clogs in the future be mindful of what you flush. Only use the right amount of toilet paper and don’t flush items like wipes or cotton balls. Regular cleaning and hot water in the pipes can also help prevent clogs.
By following this guide you can avoid calling a plumber for simple clogs. But if you can’t clear the blockage it’s okay to ask for professional help. This will keep your plumbing in top shape.
Conclusion
- You can unclog a blocked toilet without a plunger using common household items
- Hot water, dish soap and a DIY plunger alternative can clear minor clogs
- Baking soda and vinegar create a fizzy reaction that can break up blockages
- A drain snake or wire hanger can be used to manually remove obstructions
- Prevention is key – avoid flushing inappropriate items and use toilet paper responsibly
FAQ
How can I unclog a toilet without a plunger?
You can unclog a toilet without a plunger in several ways. Try pouring hot water or use a DIY plunger alternative. Baking soda and vinegar can also help as can a drain snake or wire hanger. These methods use common household items to clear the blockage.
What causes a toilet to become clogged?
Toilets can clog from too much toilet paper or flushing the wrong things. Items like wipes or sanitary products can cause problems. A faulty flush system can also lead to clogs. Knowing why it clogged helps you choose the right fix.
Is it safe to pour boiling water into a toilet bowl?
Pouring hot water can unclog a toilet but be careful. Pour slowly to avoid splashing. Check your toilet’s material first as extreme heat can damage some.
Can I use a wire hanger to unclog my toilet?
Yes, a wire hanger can be a drain snake. Straighten it and make a hook. Insert the hook into the drain and gently move it to break up the clog. Be gentle to avoid damaging the toilet or drain.
How does dish soap help in unclogging a toilet?
Dish soap can lubricate a clog and make it easier to flush. Squirt a lot of soap in the bowl and let it sit for a few minutes. Then try flushing again.
What if I can’t unclog my toilet with these methods?
If these don’t work or you think the clog is serious call a plumber. Plumbers have the tools and knowledge to fix tough clogs and prevent damage.
How do I prevent future clogs?
To avoid clogs use less toilet paper and don’t flush the wrong things. Clean your toilet regularly and check the flush system for problems. This will keep your toilet in great shape.
by RSP Crew | Feb 13, 2025
There’s nothing more frustrating than a toilet that won’t flush properly. A toilet won’t flush is a common issue that many people face. Whether it’s a slow drain, weak flush or water that just won’t go down at all, toilet troubles are the last thing you want to deal with. But ignoring the problem will only make it worse. A faulty toilet wastes water, causes major inconvenience and could even lead to costly damage if left unchecked.
The good news is many common toilet problems have simple fixes you can do yourself with a few basic tools and some know how. In this article we’ll look at the usual suspects behind a poorly flushing toilet and share some DIY solutions. We’ll also look at when to call in a pro plumber. Let’s get that toilet working again!
Common Causes of Why Your Toilet Won’t Flush
So what’s causing your commode conundrum? Here are the most common culprits:
- Clogged Toilet or Pipes When there’s a blockage water can’t get out of the bowl. This could be from too much toilet paper, flushing non-flushable items like wipes or tissues or mineral build up in the pipes over time. Signs of a clog are water rising very high in the bowl or draining very slowly when flushed.
- Low Water Level in the CisternIf there’s not enough water in the tank you’ll get a weak or incomplete flush. This is often due to a faulty float mechanism that controls the fill level or a problem with the water supply. Understanding the components of the toilet cistern can help in diagnosing these issues.
- Faulty Flapper or Flush Mechanism The flapper is the rubber seal that opens to let water rush into the bowl when you flush. If it’s worn out, has a slack chain or the flush button itself is broken flushing will be slow or water will run constantly. Maintaining the flushing mechanism is crucial for proper toilet functionality.
- Blocked Rim Jets Those little holes under the rim of the toilet bowl are called rim jets. Their job is to release water and clean the bowl sides when you flush. Mineral deposits from hard water can clog them up reducing flow power. Clogged inlet holes can also be a potential issue.
- Water Pressure IssuesLow water pressure from your home plumbing system or the municipal supply can result in a weak flush. It takes a certain amount of pressure to clear the bowl properly. Reduced water flow can significantly impact the flushing power of your toilet.
Water-Related Issues Affecting Toilet Flush
Water-related issues can significantly impact the performance of your toilet flush. One common problem is a low water level in the toilet tank. If the water level is too low, the toilet may not flush properly, leading to a weak or incomplete flush. To resolve this issue, check the water supply to the toilet and ensure that the fill valve is functioning correctly. You can also adjust the float arm to raise the water level in the tank.
Another water-related issue that can affect toilet flush is a clogged overflow pipe. The overflow pipe is designed to prevent water from overflowing into the toilet bowl. However, if the pipe becomes clogged, it can prevent the toilet from flushing properly. To clear a clogged overflow pipe, use a toilet auger or a plumbing snake to remove any blockages.
DIY Fixes
If your toilet won’t flush, there are several DIY fixes you can try before calling a professional plumber. One common issue is a clogged toilet bowl. To clear a clogged toilet bowl, use a plunger or a toilet auger to remove any blockages. You can also try using a plumbing snake to clear any clogs in the drain lines.
Another DIY fix is to adjust the flapper chain. If the flapper chain is too long, it can prevent the flapper from opening fully, leading to a weak flush. To adjust the flapper chain, simply shorten the chain to the recommended length.
Preventative Maintenance for a Healthy Toilet Bowl
Preventative maintenance is key to keeping your toilet bowl healthy and functioning properly. One important task is to clean the toilet bowl regularly. Use a toilet brush to scrub the bowl and remove any mineral deposits or stains. You can also use a toilet cleaning product to help remove tough stains.
Another important task is to check the toilet tank regularly. Ensure that the water level is at the recommended height and that the fill valve is functioning correctly. You can also check the flapper and flush valve for any signs of wear or damage.
DIY Fixes: Ready to be your own toilet troubleshooting hero? Try these with toilet paper:
- For a clogged toilet your best friend is a plunger. Not all issues are due to a broken toilet; sometimes it’s just a matter of troubleshooting the flush mechanism. Make sure you have a good seal around the bowl drain hole. Plunge up and down, maintaining the seal. If it’s a tough clog add some hot (not boiling) water to the bowl first. Avoid flushing non-degradable materials like wet wipes to prevent serious blockages.
- Still clogged after plunging? Time to bring out the big guns: a toilet auger (aka plumber’s snake). Feed the coiled wire end into the drain hole and crank the handle to push it through the pipe until you feel the blockage. Crank and push to break it up then flush. Repeat if needed.
- Check the water level in the cistern. There’s usually a mark indicating the fill line about 1/2 inch below the top of the overflow tube. Adjust the float mechanism so it stops at this level. Make sure the refill tube isn’t inserted too far into the overflow tube which can siphon water out. Lift the tank lid to inspect components like the float and water level.
- To clean gunky rim jets pour a few cups of white vinegar into the overflow tube in the tank and let it sit for a few hours to dissolve mineral deposits. Give the holes a gentle scrub with an old toothbrush then flush. For stubborn build-up use a specialised acid-based cleaner.
- Replacing a faulty flapper is easier than you think. Turn off the water supply to the toilet, flush to empty the tank, then simply unhook the old flapper and install the new one, attaching the chain. Turn the water back on and test it out. (Make sure to get a flapper that fits your specific toilet model.)
When to Call the Plumber
Sometimes toilet troubles are beyond a simple DIY. Persistent issues with toilet flushes, such as ineffective flushing or problems with the flush mechanism, often require a professional assessment. Here’s when to call in Rapid Service Plumbing:
- If you’ve tried plunging and snaking thoroughly but the clog just won’t quit there could be a more serious blockage deep in the sewer line that requires special plumbing equipment to clear.
- Repairs to the inner workings of the cistern like the flush valve or fill valve are often best left to a plumber to avoid water damage or ending up with a non-functional toilet.
- If multiple drains in your home are backing up or you have ongoing or repeated problems with your toilet it’s time for a plumber to assess your plumbing system and fix any underlying issues.
Flush Away Water Waste: Did you know older toilets use 9-11 liters of water per flush? Modern dual-flush toilets use 3-6 liters and flush properly.
Upgrading to a water-wise dual flush system could cut your toilet water usage in half – a win for the planet and your wallet. Plus less water down the drain means your septic system (if you have one) will work better and last longer.
Regular toilet maintenance is key to avoiding water waste due to leaks or poor flushing. Keep your toilet in good shape and it will reward you with low-water flushes for years to come.
Happy Toilet Tips
- A healthy toilet means a happy home – don’t ignore problems, fix them early
- Most toilet problems have DIY solutions using basic tools and techniques
- Know when you’re in over your head – some repairs require a plumber
- Upgrade to a dual-flush toilet to dramatically reduce water per flush
- Maintenance goes a long way in preventing future flushing woes
Now you’re armed with the tools to tackle toilet troubles and keep things flowing in the loo. Happy flushing!
by RSP Crew | Feb 4, 2025
If you’ve noticed small, moth-like insects around your sinks or drains, you likely have drain flies. This article will show you how to identify and eliminate drain flies in Australia. Specifically, we will focus on drain flies Australia and provide effective solutions for getting rid of them.Identifying Drain Flies in Australia
Drain flies, also known as filter flies, moth flies, sewer flies, and sewer gnats, are often seen fluttering around sinks and bathtubs, resembling tiny moths with their distinctive appearance. These insects have tiny, hairy wings and antennae, typically ranging in color from grey to black, and measure about 1.5-5mm in size. Their moth-like appearance makes them easy to identify compared to other small flies like fruit flies and sink flies.
These pests thrive in moist areas such as drains, septic tanks, and places with standing water where they find ample organic material to breed. They are not just limited to bathroom drains but can also be found in kitchen sinks, floor drains, and other moist environments around the house, which serve as a breeding ground for them.
Identifying their typical habitats and recognising their appearance are essential in managing a drain fly infestation.
The Life Cycle of Drain Flies

Grasping the life cycle of drain flies aids in their effective elimination. Drain flies undergo a complete metamorphosis involving four stages: egg, larva, pupa, and adult. Female drain flies can lay between 30 to 200 eggs at a time, usually in moist areas rich in organic material such as the inner surfaces of drains or septic tanks. These eggs hatch in about 7 to 28 days, depending on environmental conditions.
The larval stage, which lasts between 9 to 15 days at optimal temperatures, is when the drain fly larvae feed on organic matter, aiding their growth. Once mature, the larvae transition into the pupal stage, characterised by their yellow to brown color and small respiratory structures resembling horns.
The entire life cycle of drain flies typically spans between 21 to 27 days. This rapid development means that a small infestation can quickly become a larger problem if not addressed promptly. Recognising each stage of their life cycle allows for targeted treatment methods to effectively eliminate them.
Are Drain Flies Harmful?
While drain flies are generally harmless, their presence can be a nuisance and may indicate underlying plumbing or sanitation issues that need attention. Some individuals may experience allergic reactions to the fine hairs of these flies, which can cause skin irritation or respiratory issues. However, it’s important to note that drain flies do not bite and are not known to transmit diseases.
The real concern with drain flies is the potential plumbing problems they signify. Their breeding grounds in moist, organic-rich environments like drains and septic tanks suggest that there may be clogs or leaks that need fixing. Addressing these drain fly issues not only helps eliminate the current infestation but also prevents future drain fly problem from arising.
Common Causes of Drain Fly Infestations

Drain flies thrive in environments with standing water and organic matter, which serve as ideal breeding grounds. Clogged drains or sewer lines create stagnant water, attracting these pests. Unused toilets and leaking pipes can also become breeding grounds for drain flies due to the accumulation of standing water.
These insects are commonly spotted in areas with accumulated organic matter, such as food scraps, oils, fats, and other debris in kitchen sinks. The moist environments rich in organic materials provide ample food for drain fly larvae to thrive. The presence of drain flies can signal unsanitary plumbing conditions that need addressing to prevent the infestation from worsening.
Regular cleaning of pipes and sinks is an effective method for keeping drain flies away. Keeping drains clear of organic buildup and promptly fixing leaks can significantly reduce the chances of attracting drain flies. Maintaining cleanliness and proper sanitation is key to preventing a drain fly infestation.
Steps to Get Rid of Drain Flies

Eliminating drain flies involves a series of steps aimed at targeting their breeding grounds and preventing future infestations. These methods range from locating the source of the infestation to using natural remedies like vinegar and baking soda, as well as chemical cleaners and tools to kill drain flies.
Adhering to these steps can effectively rid your home of drain flies and prevent their return.
Locate the Source of the Infestation
The first step in eliminating drain flies is to locate their breeding grounds. Check for stagnant water in drains, rotting fruit, animal waste, and any decaying organic material. Drains, pipes, and other moist areas are potential breeding sites for drain flies. Pinpointing these areas allows for more targeted efforts.
Regularly cleaning and flushing drains can help prevent the entry of drain flies. By keeping these areas clean and free from organic buildup, you can significantly reduce the chances of a drain fly infestation. Addressing all potential breeding grounds is vital for eliminating these pests.
Pour Boiling Water Down Drains
Boiling hot water poured down the drain can effectively eliminate drain fly larvae. This method kills the larvae, preventing them from maturing into adult flies. For best results, pour boiling water down the drain 1-2 times a day for about a week.
Simple and cost-effective, this method is an excellent first step in tackling a drain fly infestation. Consistently using boiling water over several days ensures any remaining larvae are eradicated, preventing recurrence.
Natural Remedies: Vinegar and Baking Soda
Vinegar and baking soda prove highly effective in combating drain flies. Mixing baking soda with white vinegar creates a reaction that helps break down organic matter and attract drain flies. Pouring this mixture down the drain can help eliminate drain flies and their larvae.
Another effective trap involves mixing sugar, water, vinegar, and a few drops of dish soap. This mixture attracts drain flies, and the soap makes it difficult for them to escape.
Safe, inexpensive, and effective, these natural remedies tackle a drain fly infestation without harsh chemicals.
Chemical Cleaners and Tools
Persistent infestations might require chemical cleaners and tools. Products like Drano and Bio-Clean are commonly used to eliminate drain flies by removing the organic buildup that attracts them. Physical scrubbing with pipe brushes can also help remove stubborn organic matter.
Follow instructions closely when using chemical cleaners to ensure safe usage. Combining chemical cleaners with natural remedies like baking soda and vinegar enhances the cleaning effort against drain flies.
Together, these methods offer a comprehensive approach to eliminating drain flies and their breeding grounds.
Preventing Future Drain Fly Infestations

Preventing future drain fly infestations involves maintaining cleanliness and addressing potential breeding grounds. Regular cleaning of drains removes organic materials that serve as breeding grounds for drain flies. Professional drain cleaning services can also help prevent the re-emergence of infestations.
Promptly repairing leaks and using all household drains regularly helps maintain dry environments, less conducive to drain fly breeding. Additionally, keeping outdoor compost piles contained and dry reduces the likelihood of attracting drain flies.
These preventive measures can significantly reduce the chances to prevent drain flies and a drain fly infestation.
Professional Help for Persistent Infestations
If DIY methods fail to eliminate the infestation effectively after 20 days, it’s time to call a professional plumber. Professional plumbers can pinpoint plumbing issues and apply commercial-grade treatments to eliminate drain flies effectively. They have the expertise and tools to tackle even the most stubborn infestations.
Rapid Service Plumbing, a trusted provider in Sydney, offers expert plumbing services to handle persistent drain fly problems and issues related to drain pipes. Their expertise ensures the root causes of the infestation are addressed, providing a long-term solution.
Key Takeaways
- Drain flies thrive in moist environments with organic matter, often indicating plumbing issues that require attention.
- An understanding of the drain fly life cycle helps to implement targeted elimination strategies effectively.
- Preventing future infestations involves regular cleaning of drains, addressing potential breeding grounds, and seeking professional help if DIY methods are unsuccessful.
Frequently Asked Questions
How do I permanently get rid of drain flies?
To permanently eliminate drain flies, regularly pour half a cup of baking soda followed by half a cup of white vinegar down the sink. Then, flush it with boiling water after a few minutes. Repeat this process every few days until the flies are gone.
Does Australia have drain flies?
Yes, Australia does have drain flies, commonly known as filter flies or sewer flies, which can be a nuisance in homes.
Why do I suddenly have drain flies?
Drain flies appear suddenly due to stagnant water in areas like slow drains, unused toilets, or leaking pipes. To eliminate them, identify and address these sources of moisture.
What are the common signs of a drain fly infestation?
Common signs of a drain fly infestation include the presence of small, moth-like flies near sinks and drains, as well as larvae found in moist, organic-rich areas. Addressing these signs promptly can help eliminate the problem.
How long does it take to get rid of a drain fly infestation?
To effectively eliminate a drain fly infestation, it generally takes a few days to a week, depending on the severity and treatment methods applied. Consistent monitoring and sanitation practices will expedite the process.
by RSP Crew | Jan 10, 2025
A French drain isn’t one that plays “La Marseillaise” when you hit the flush button. But if you’re struggling with drainage in your yard, a French drain system might very well be the easiest and most beautiful solution.
To look at a French drain you might just think it’s a pretty rock garden path – and that’s one of the best things about it. Better still is that it will solve your garden drainage problems, whether it’s ground and surface water that’s causing all the trouble. Best of all your home and structures foundations will be protected from erosion and flooding – and all with French drains that are easy to install, look good and actually work.
Definition and Purpose
A French drain is a type of drainage system designed to collect and redirect surface water and groundwater away from a specific area, such as a building foundation or a low-lying area of a yard. The primary purpose of a French drain is to prevent water accumulation and damage to structures, landscaping, and surrounding soil. By redirecting water away from the problem area, French drains help to maintain proper drainage, prevent soil erosion, and reduce the risk of water damage.
History and Development
The concept of the French drain dates back to the mid-19th century, when it was popularized by Henry Flagg French, an American lawyer and farmer. French drains were originally trenches filled with rocks or gravel that were used to divert water away from agricultural fields and buildings. Over time, the design of the French drain has evolved to include perforated pipes, which increase the volume of water that can flow through the system. Modern French drains are designed to be more efficient and effective, with a variety of materials and configurations available to suit different applications.
Types of French Drains
There are several types of French drains, each with its own unique characteristics and applications.
Surface French Drains
Surface French drains are shallow trenches that are used to collect surface water and redirect it away from a specific area. They are often used in areas with minor water accumulation issues and are typically installed in a shallow trench, usually 12-18 inches deep. Surface French drains are ideal for collecting water from roofs, sidewalks, and driveways.
Subsurface French Drains
Subsurface French drains are deeper and more effective for managing groundwater. They are commonly used around foundations and basements to prevent water seepage and damage. Subsurface French drains are typically installed in a deeper trench, usually 2-3 feet deep, and are designed to capture and redirect groundwater away from the problem area.
How Does a French Drain Work?
In a nutshell a simple but clever array of perforated pipe in sloping trenches with landscape fabric and decorative gravel or stone on top. Or if you like Henry Flagg French’s old school and innovative 19th century version you can get away with just a rock or gravel filled trench – although it will clog more easily than the modern version.
Benefits of French Drain Systems
French drains have many advantages for homeowners:
- Protect your foundations
- Permanent and low maintenance solution
- Looks good with seamless landscape integration
- Full versatility
- Easy & cheap to install
- Water redirection: French drains redirect excess water away from problem areas, preventing pooling or flooding
- Versatile: Can be installed anywhere, around foundations, in yards or along retaining walls
- Long term solution: With maintenance French drains will last for years
- Improves soil health: Reduces waterlogging, good for plant growth and lawn health
- Customisable: Can be designed to suit your property and style
French Drains vs Other Drainage Solutions
When considering drainage options you need to know how French drains compare to others:
1. Surface Drains:
- Pros: Visible, easy to maintain
- Cons: Ugly, tripping hazards
2. Sump Pumps:
- Pros: Good for basements, can handle lots of water, and can be installed under the basement floor to capture and redirect excess water
- Cons: Needs electricity, regular maintenance and can fail during power outages
3. Dry Wells:
- Pros: Good for areas with permeable soil
- Cons: Limited capacity, can get overwhelmed in heavy rain
4. French Drains:
- Pros: Looks good, good for large areas, passive
- Cons: Installation can be hard work, may need professional help for complex situations
French drains are often the best balance of effectiveness, looks and long term performance for many Australian properties.
How to Install a French Drain in 8 Easy Steps
While most plumbing & drainage work across Sydney and beyond will require the mandatory and skilled workmanship of fully-licensed Sydney plumbers and drainage specialists, installing a French drain is something you can do yourself. Here’s how:
Prepare
The most important thing to know before you start is what’s underneath that garden surface. Because hitting a pipe, electrical line or another underground cable, pipe or installation isn’t just going to mess up your and your neighbour’s place – it can be dangerous.
TIP: Try the Before You Dig Australia service at www.byda.com.au.
Follow the rules
Are you sure there aren’t any zoning or runoff regulations that will ruin your French drain party later on? Another thing to check off the list is whether your proposed drain configuration won’t cause drainage issues for your neighbour, because both of these will get you in hot and expensive water.
Find a slope
It’s a clever drainage innovation but a French drain is still very simple and only works if gravity is on your side. Remember, the whole idea is that water will seep into your laid pipes and be carried away because of the downhill gradient, so:
– Identify the drainage area
– Start at the top
– Route your downhill drainage path
– End the drain where you want the water to go
If your land is flat as a pancake you’ll need to create your own slope by digging shallowest at one end and deeper at the other end with at least a 1-2% grade.
Dig the trench
You’ll need it about 30cm wide and 50cm deep and make sure you don’t disturb the natural slope of the land with a poorly dug trench.
Line it
Your French drain will be lined with fabric – but it needs to be fully water-permeable. We recommend genuine landscape fabric which is designed for this purpose and is installed by:
– Rolling it out over the trench
– Leaving a 30cm gap on both sides
– Tamping down to fill the gaps
– Securing it in place
Add the gravel
Now pour a 5-10cm layer of gravel on top of the fabric.
Add the pipe
Any drain pipe will do but PVC will last the longest and work the best. It will need to have holes or perforations to do the drainage work and those holes should be laid face down and then the whole thing covered with another thin layer of gravel to within 5-10cm of the top of the trench.
Done
Fold the remaining fabric over the gravel and cover it all in soil. You can then finish off the look however you like – grass or just decorative stones.
French Drain Essentials
Get these before you start:
- Perforated pipe (PVC or corrugated)
- Landscape fabric
- Gravel or crushed stone
- Sand (for bedding)
- Topsoil (for finishing)
- Digging tools (shovel, pickaxe etc.)
- Level or laser level
- Tape measure
- Safety equipment (gloves, safety glasses)
Professional or DIY French Drain Installation
Deciding between professional installation and DIY depends on:
Professional Installation:
– Pros: Expertise in design and local regulations, proper equipment, warranty on work
– Cons: Higher upfront cost
DIY Installation:
– Pros: Cost savings, personal satisfaction
– Cons: Risk of errors, time consuming, may not have proper tools
Consider professional installation for complex projects, areas with utilities or if you’re not sure of local regulations. DIY is suitable for simple, straightforward installations in open areas.
French Drain Costs
Costs will vary depending on:
- Length of drain
- Depth of installation
- Soil type and excavation difficulty
- Materials used (e.g. type of pipe, gravel quality)
- Professional or DIY
In Australia professional installation can cost between $100 to $250 per linear metre. DIY will save you money but will take time and effort.
Regulations and Permits for French Drain
- Council Approval: Check if you need approval from your local council.
- Stormwater: Make sure your drain complies with local stormwater regulations, including proper connection to a storm drain.
- Property Boundaries: Check your drain doesn’t impact neighboring properties.
- Environmental: Some areas may have restrictions due to environmental concerns.
- Utilities: Always check for underground utilities before you dig.
Contact your local council or a licensed plumber for more information in your area.
French Drain Maintenance
Maintenance will keep your French drain working for years to come:
- Check-up: Inspect for clogging or damage at least twice a year.
- Debris removal: Clear leaves, twigs etc. from the surface of the drain.
- Flushing: Flush the system with water every now and then to clear sediment.
- Landscape maintenance: Trim nearby plants to prevent roots from entering the drain.
- Grate cleaning: If your drain has a grate, clean it regularly to allow water to flow.
- Professional check-up: Consider having a professional check the system every few years.
French Drain Problems
Even well installed French drains can have issues. Here are common problems and fixes:
- Clogging: If water isn’t draining, the pipe may be clogged. Flush the system or use a plumber’s snake to clear blockages.
- Surface water pooling: This could mean the drain is overwhelmed or not sloped correctly. Add more drainage or adjust the slope.
- Erosion around the drain: Add more gravel or adjust landscaping to prevent soil erosion.
- Foul odours: This means standing water or organic matter buildup. Flush the system and check the slope.
- Frost heave: In cold climates make sure the drain is installed below the frost line to prevent damage from freezing.
Advanced French Drain Installation
For more complex drainage issues try:
- Dual pipe systems: A second pipe for extra drainage in heavy rainfall areas.
- Sump pump integration: A French drain with a sump pump for basements or areas below the water table.
- Geotextile wrapping: Wrap the entire drain in geotextile fabric for extra filtration.
- Cleanout ports: Install access points for maintenance and cleaning.
- Bioswale integration: French drains with bioswales for natural filtration.
Need help with your French drain?
Every time it rains and pours across Sydney we are all reminded about the importance of good, professional stormwater drainage solutions that protect your home, family, garden, investments – and sanity!
Blacktown, Engadine, Castle Hill, Casula and Penrith are some of the most flood prone areas according to NRMA but nowhere is immune. If you want to put your French drains in the best possible hands give Sydney’s friendliest drainage experts here at Rapid Service Plumbing a call.
by RSP Crew | Dec 5, 2024
Rinnai is the name you know for hot water in Australia and for good reason – it’s the brand you can rely on to keep that water hot! But even the most reliable systems can have problems. This guide combines real life experience with technical knowledge to help you troubleshoot and fix common Rinnai hot water issues.
Know Your Rinnai
Before we get into the issues, get to know your Rinnai gas heater. Get familiar with the control panel, temperature settings and any model specific features.
Additionally, checking the gas meter is crucial to ensure that the gas supply is reliable and safe for optimal performance.
Understanding Your Rinnai Hot Water System
Understanding your Rinnai hot water system is crucial for effective troubleshooting and maintenance. Rinnai hot water systems are designed to provide a continuous supply of hot water, ensuring comfort and convenience in your home. These systems come in various models, including gas and electric options, each tailored to meet different needs.
The system consists of several key components, including the water heater, gas supply, and power supply. The water heater is the core of the system, responsible for heating the water to the desired temperature. The gas supply ensures that the heater has the necessary fuel to operate, while the power supply provides the electricity needed for the system’s controls and safety features.
Familiarising yourself with these components and their functions can help you identify potential issues and perform basic troubleshooting. For instance, knowing where the gas valve is located and how to check if it’s fully open can save you time and effort when dealing with a no-hot-water situation. Similarly, understanding the role of the power supply can help you diagnose issues related to the system’s control panel or digital monitor.
By taking the time to understand your Rinnai hot water system, you can ensure that it operates efficiently and reliably, providing you with the hot water you need when you need it.
Rinnai Hot Water Issues and Solutions
1. No Hot Water
If your Rinnai isn’t producing hot water, check:
- Gas supply: Is the gas turned on? Are there any supply issues?
- Ignition: Look for Error Code 11, it’s an ignition problem.
- Temperature settings: Have the settings been changed accidentally?
Effective hot water system troubleshooting can help identify the root cause of the issue and restore hot water supply quickly.
2. Lukewarm Water
For not hot enough water:
- Check the thermostat settings.
- Check the gas valve is fully open.
- Heat exchanger or scaling due to hard water?
- Ensure that the flow of hot water to the hot taps is not restricted, as this can affect the overall water temperature.
in which case you’ll need a good hot water repair plumber.
3. System Turns Off Suddenly
Sudden shutdowns can be caused by:
- Overheating (Error Code 16)
- Ventilation issues (Error Code 10)
- Unspecified system faults (Errors 70, 71 & 72)
4. Water Leaks
Small water leaks are normal, but excessive leaking could mean:
- Faulty valves
- Loose fittings or connections
- Tank corrosion (in extreme cases)
How to Reset Your Rinnai Gas Heater: Model Specific Instructions
Resetting your Rinnai heater will often fix minor issues. Here’s how:
- Find the control panel on your Rinnai gas heater.
- Switch off the power to the unit.
- Wait 1-2 minutes.
- Switch the power back on.
- If your model has a reset button, press and hold for 3-5 seconds.
For model specific instructions:
- Rinnai Infinity models: Press the ‘On/Off’ button twice.
- Rinnai Deluxe models: Hold the ‘Priority’ button for 5 seconds, then press ‘On/Off’.
- Rinnai Portable Gas Heaters: Turn the control dial to ‘Off’, unplug the unit, wait 10 seconds, then plug it back in and turn on.
If these steps do not resolve the issue, it may be time to consider making a service call to a professional technician.
Rinnai Gas Heater Error Codes
Error codes will give you an idea of what’s wrong:
- Error 11: Ignition failure. Check gas supply and igniter.
- Error 12: Flame failure. Check gas pressure and clean flame rod.
- Error 14: Overheat. Let the unit cool and ensure proper ventilation.
- Error 16: Over temperature warning. Check blocked exhaust or air intake.
- Error 32: Outgoing water temperature sensor fault. May need professional help.
- Error 61: Combustion fan failure. Check for obstructions or call a technician.
Understanding these error codes is crucial for diagnosing issues with your Rinnai hot water heater and ensuring it operates efficiently.
You might even have a new electric hot water system model with a remote, which can be used – but bear in mind that most hot water temperature in Australia is restricted due to the scalding risk.
Pre-Reset Checklist
Before you reset your Rinnai heater do this:
- Check gas supply: Gas valve fully open.
- Check power supply: Heater properly plugged in or wired.
- Check water connections: Look for leaks or blockages.
- Check for error codes: Note any on the control panel.
- Listen for unusual noises: During operation.
- Recent changes: Any recent changes or weather events?
Ensure that the hot water taps press is functioning correctly to avoid any issues during the reset process.
Safety First: Precautions for Resetting Your Rinnai Gas Heater
Always safety first when dealing with gas appliances:
- Switch off the gas before any reset or maintenance.
- Make sure the area around the heater is well ventilated.
- Never reset a damaged or gas leaking heater.
- Wait for the unit to cool before touching any parts.
- Wear appropriate safety gear (gloves) when handling the unit.
- Keep flammable materials away from the heater.
Advanced Troubleshooting
Advanced troubleshooting involves a more in-depth analysis of your Rinnai hot water system to identify complex issues that may not be immediately apparent. This level of troubleshooting often requires specialised tools and expertise, and it’s recommended to seek the help of a professional plumber if you’re not comfortable with DIY troubleshooting.
Here are some advanced troubleshooting techniques to consider:
- Checking the Gas Supply: Ensure that the gas supply is sufficient and properly connected. This includes verifying that the gas valve is fully open and that there are no kinks or blockages in the gas lines.
- Inspecting the Power Supply: Make sure the power supply is functioning correctly. Check that the heater is properly plugged in or wired and that there are no issues with the electrical connections.
- Analysing Error Codes: Pay attention to the error codes displayed on the digital monitor. These codes can provide valuable insights into what might be wrong with your system. Refer to the error code guide in this article for specific troubleshooting steps.
- Checking the Inlet Water Filter: Ensure that the inlet water filter is clean and free of debris. A clogged filter can restrict water flow and affect the system’s performance.
- Inspecting the Heating Cycle: Observe the heating cycle to ensure it’s functioning correctly. This includes checking for any irregularities in the ignition process, flame stability, and water temperature regulation.
By performing these advanced troubleshooting steps, you can identify and address more complex issues with your Rinnai hot water system, ensuring it operates efficiently and reliably.
Repair and Replacement Options
If your Rinnai hot water system is not functioning correctly, you may need to consider repair or replacement options. Repairing your system can be a cost-effective solution, but it’s essential to ensure that the repair is done correctly to avoid further issues. Replacement options may be necessary if your system is old or damaged beyond repair.
Here are some factors to consider when deciding between repair and replacement:
- Age and Condition of Your System: Older systems may be more prone to breakdowns and less energy-efficient. If your system is over 10-15 years old, it might be time to consider a replacement.
- Cost of Repair vs. Replacement: Compare the cost of repairing your current system with the cost of a new one. If the repair costs are high and the system is old, replacement might be a more economical choice in the long run.
- Energy Efficiency and Performance: Newer models of Rinnai hot water systems are often more energy-efficient and offer better performance. Upgrading to a new system can result in lower energy bills and improved hot water delivery.
- Availability of Replacement Parts and Labor: Ensure that replacement parts for your current system are readily available. If parts are hard to find or expensive, it might be more practical to replace the system.
It’s recommended to consult a professional plumber to determine the best course of action for your Rinnai hot water system. They can assess your system and provide recommendations for repair or replacement, ensuring that your hot water needs are met efficiently and effectively.
Call a Pro
While many can be fixed at home, some need expert help. Call a licensed technician if:
- You smell gas or think you have a leak.
- The heater keeps shutting off or displaying error codes.
- There’s water leakage or damage to the unit.
- You hear unusual noises or see visible flame issues.
- You’re not comfortable doing maintenance or resets yourself.
- The unit hasn’t been serviced in over a year.
Maintenance: Minimise Resets
Maintenance will prevent many problems:
- Annual professional service.
- Clean or replace air filters as per manufacturer’s instructions.
- Keep the area around the heater clean and clear of debris.
- Check and clean exhaust vent periodically.
- Check water hardness and consider a water softener if needed.
- Inspect visible pipes and connections for wear and corrosion.
Resetting Rinnai Gas Heaters
Portable
- Switch off and unplug the unit.
- Wait 10 minutes for the unit to cool.
- Check and clean air filter if needed.
- Plug back in and switch on.
Continuous Flow
- Switch off at the switchboard.
- Wait 5 minutes.
- Switch back on.
- Press the ‘On’ button on the temperature controller.
Storage Tank
- Find the reset button (usually near the thermostat).
- Press and hold for 3-5 seconds.
- If still not working, switch off power and gas, wait 30 minutes, then switch back on and try again.
FAQs: Rinnai Gas Heater Reset
How often should I need to reset my Rinnai gas heater?
Rarely. If you need to reset frequently there’s an underlying issue that needs professional attention.
Will a reset clear all error codes?
No. Some error codes will remain after a reset and need further action.
Can I reset my Rinnai heater if it’s still hot?
It’s best to wait until the unit has cooled before attempting a reset for safety.
Will a reset void my warranty?
Standard resets shouldn’t affect your warranty but check your warranty terms for conditions.
Why did my Rinnai gas hot water system just suddenly turn off?
The main cause of a sudden but apparently-routine shutdown of your Rinnai gas hot water system is overheating – so you might be seeing Error Code 16.
Gas Supply Troubleshooting
If you think you have gas supply issues:
- Check the main gas valve is fully open.
- Check there are no kinks in the gas lines.
- Listen for gas flow when a hot water tap is turned on.
- Check other gas appliances to see if they’re getting gas to the property.
- If you think you have a gas leak, switch off the supply and call your gas provider.
Additionally, ensure that the hot tap is functioning correctly to maintain a continuous flow of hot water.
The Priority Button
The Priority button is useful for managing hot water in different areas of your home:
- It sets the water temperature for that controller.
- Only one controller can have priority at a time.
- To change priority turn off all hot water taps and press the Priority button on the desired controller.
- The Priority indicator will light up on the active controller.
- Use this feature to manage hot water temperature in different areas of your home.
Conclusion
Your Rinnai hot water system is designed to provide years of reliable service. By understanding common issues, knowing how to perform basic troubleshooting, and maintaining your system properly, you can ensure optimal performance and longevity. Remember, when in doubt, it’s always best to consult with a professional plumber or technician.
For expert help with your Rinnai hot water system in Sydney, don’t hesitate to contact Rapid Service Plumbing. Our team of friendly plumbers are available 24/7, offering fast, affordable solutions backed by a lifetime workmanship guarantee.
by RSP Crew | Dec 2, 2024
How many times have you been told that Sydney tap water is “perfectly safe to drink?” If your answer is “quite a lot,” consider this: the word “perfectly” is a pretty strong one! Because while you’re certainly not going to keel over with your next sip of water from the tap, there’s not really any doubt that you can taste chlorine, is there? So today we’re going to probe a critical question: Is Sydney tap water safe to drink?
First, the good news. All of the tap water supplied to homes in this country is subject to the Australian Drinking Water Guidelines, which concerns itself with just how much fiddling with your tap water the authorities can do. These guidelines include specific guideline values for acceptable concentrations of various substances, established based on health risk assessments. The fine print is that the guidelines are in fact “not mandatory,” even though Sydney Water – the statutory supplier of Sydney drinking water – reassures us that the filtering it does is in compliance with the guidelines, making it safe to drink straight from the tap.
Is it safe to drink tap water in Sydney?
The global water advisory authority tapsafe.org, meanwhile, doesn’t quite go along with the ‘perfectly safe’ narrative and tells us that Sydney tap water is actually “generally safe to drink.” And while our water is certainly as good as the safest tap water in the world, the same organisation admits that there’s no guarantee it doesn’t contain “a number of pollutants and contaminants.” Sydney Water, on the other hand, tells us it tests Sydney tap water quality in laboratories for “70 different characteristics” – taste, smell, colour, chemicals and microorganisms. Among those contaminants are ‘forever chemicals’, known for their persistence in the environment and resistance to breaking down. The water analysis is done all the way from the sources, like lakes and rivers, all the way to your tap – and according to NSW Health, “there is no such thing as naturally pure water.” That’s true. In those rivers and dams and other water sources, NSW Health says Sydney’s water “dissolves or absorbs a range of substances” – most of which are “harmless.” Even so, the fact that some of them may not be perfectly harmless is precisely why Sydney tap water is chlorinated before it gets into your glass in the kitchen.
Sydney Water Treatment Processes
Sydney’s water treatment involves several stages to ensure safety and quality. Filtration plants play a big role in this process, particularly in addressing the presence of PFAS chemicals in water sources. The process includes screening to remove solid objects, flocculation to clump fine particles, filtration through sand or anthracite, and disinfection using chlorine and ammonia. Fluoride is also added to promote dental health. The Cascade water filtration plant is a significant location for PFAS chemical testing results, with high levels found there compared to other filtration plants. The Kurnell desalination plant supplements the water supply when dam levels are low, using reverse osmosis to extract freshwater from saltwater.
Is Sydney Water Hard or Soft?
Sydney’s water is generally “soft”, meaning low concentrations of calcium and magnesium ions. This is because of the city’s reliance on surface water sources like dams and reservoirs, and the treatment processes used by Sydney Water. Soft water is gentle on skin, hair and household appliances, and reduces scale build-up in kettles and hot water systems. The exact hardness may vary slightly across suburbs, but Sydney’s water is generally soft.
Regular Testing and MonitoringWaterNSW monitors both surface and groundwater sources, tracking physical, chemical, biological, radiological, hydrological and meteorological parameters. This ensures any issues are detected early and addressed quickly. The results are reported in annual and quarterly reports.
Forever Chemicals (PFAS/PFOS) in Sydney Tap Water
PFAS (per- and polyfluoroalkyl substances), sometimes called “forever chemicals”, are synthetic compounds that persist in the environment. One of the primary substances of concern is perfluorooctanoic acid (PFOA). WaterNSW conducts targeted, risk-based investigations and rigorous testing for PFAS across the Greater Sydney catchment and dams, following strict sampling and laboratory protocols. WaterNSW is highly regulated and adheres to the highest standards to manage any risks from PFAS. Current monitoring shows Sydney’s water supply is compliant with safety standards, but ongoing testing and regulatory oversight will continue as science and technology evolves.
Microplastics and New Contaminants
Recent studies have found microplastics in wastewater in the greater Sydney region, with levels varying depending on treatment processes. Wastewater treatment plants are being monitored for microplastic content and research is ongoing to assess the effectiveness of removal and the impact on drinking water supplies. While the risk to human health is still being studied, Sydney Water and regulatory agencies are monitoring for these and other emerging contaminants and adapting treatment processes as needed.
Australian Drinking Water Guidelines
When it comes to ensuring the safety and quality of our drinking water, the Australian Drinking Water Guidelines (ADWG) are the benchmark. Developed by the National Health and Medical Research Council (NHMRC) and the Natural Resource Management Ministerial Council, these guidelines provide a comprehensive framework for managing drinking water quality across Australia.
The ADWG is based on the latest scientific research and is reviewed regularly to stay current and effective. These guidelines set out acceptable levels for various water quality parameters – pH, turbidity, bacteria – and provide detailed guidance on treatment processes to remove contaminants from drinking water and monitoring requirements to ensure ongoing safety.
In short, the ADWG covers everything from acceptable levels of different substances in our water to best practice treatment and monitoring. This thorough approach means the drinking water flowing from our taps is safe and of high quality, giving us all peace of mind.
Chemicals in Sydney Tap Water
Water has disinfectants like chlorine and chloramine to kill pathogens. Public health warnings often highlight the presence of blue green algae, or cyanobacteria, which can affect water safety especially during flooding and advise to boil water as a precaution in affected areas. Boiling water is a critical precaution during incidents that compromise drinking water quality to ensure safety from pathogens and contaminants. Fluoride is added for dental health. Trace amounts of heavy metals like lead, copper, cadmium and arsenic can also be present due to old plumbing systems. While these are generally within safe limits, home filtration systems can further reduce their presence.
Why Does Sydney Water Taste Like Chlorine?
Chlorine is added to Sydney’s water to keep it safe from bacteria and viruses as it travels through the distribution system. While necessary for public health, this can result in a taste or smell if you’re sensitive to it. Running your tap for a short time or using a filter can help reduce chlorine taste.
Where does Sydney get its water from?
Rainwater in five catchment areas of Sydney (Warragamba, Shoalhaven, Upper Nepean, Woronora and Blue Mountains) flows into many creeks and rivers that supply 11 major dams. The combined capacity is 2.6 million megalitres! More than 80% of Sydney’s water comes from natural sources, mainly the massive Warragamba Dam and is treated at the Prospect water filtration plant which meets the standards set by the Australian Drinking Water Guidelines.
Sydney’s drinking water comes from five main catchment areas: Warragamba, Shoalhaven, Upper Nepean, Woronora, and the Blue Mountains. Rainwater flows into creeks and rivers, supplying 11 major dams. Over 80% of Sydney’s water is sourced from Warragamba Dam and treated at the Prospect Water Filtration Plant before distribution. When dam levels are low, the Kurnell desalination plant supplements supply using reverse osmosis.
Incidents and Warnings
Even with the robust framework provided by the Australian Drinking Water Guidelines, incidents affecting drinking water quality can still occur. Natural events and accidents can introduce contaminants into our water supply and we need to act quickly to protect public health.
PFAS chemicals, also known as ‘forever chemicals’, fail to break down in the environment, highlighting their persistence and potential risks. These chemicals can remain in various products and the environment for an extended period without decomposing, raising concerns about their impact on health and safety.
For example, flooding can wash contaminants into water sources, algal blooms can produce toxins that affect water quality and chemical spills can introduce harmful substances into our drinking water.
When this happens, authorities issue warnings and take action to protect public health. This may include boil water advisories where residents are advised to boil their water before drinking to kill any harmful microorganisms. In more severe cases, authorities may issue “do not drink” advisories or provide alternative water supplies to affected areas.
Please heed these warnings and follow the advice of the relevant authorities to ensure your drinking water is safe. Stay informed and take precautions to protect yourself and your family from potential health risks.
What to Do If a Water Warning Is Issued
Sometimes natural events like flooding or algal blooms or incidents like chemical spills can affect water quality. When this happens, authorities may issue boil water advisories or “do not drink” warnings.
If you receive a warning:
- Follow all official advice immediately.
- Boil water before drinking, cooking or brushing teeth if advised.
- Use bottled or alternative water sources if a “do not drink” warning is issued.
- Even low levels of contaminants can be a concern and should be addressed by following official advice.
- Stay updated via your local council, water utility or NSW Health.
Environmental and Health Benefits
Drinking tap water instead of bottled water reduces plastic waste and energy consumption associated with production and transportation. Fluoride in water helps prevent tooth decay, contributes to dental health. Tap water is cost effective, promotes dental health due to fluoride content and is subject to strict quality controls that often exceed those for bottled water.
Tap Water and Your Appliances Sydney’s soft water is gentle on appliances, reducing scale build-up in kettles, dishwashers and hot water systems. This can extend the life of your appliances and reduce maintenance needs. However if you notice residue or build-up it may be due to other factors like sediment or plumbing materials not water hardness.
Discoloured or Odd Tasting Water
Discolouration is usually caused by sediment being stirred up by changes in water flow or pressure. Running a garden tap for a few minutes can clear this. If discolouration persists contact local authorities for assistance. For unusual tastes or odours consider using a home filtration system to improve water quality. Using filtered water can eliminate traces of contaminants and provide safer and better tasting water especially in areas with water quality issues.
Should You Filter Sydney Tap Water?
While Sydney’s water is safe, home filtration can give you extra peace of mind. Filters can:
- Remove chlorine and improve taste.
- Reduce trace metals from old plumbing.
- Lower the presence of microplastics or PFAS (depending on filter type).
- Provide an extra layer of protection for vulnerable populations.
Monitoring and managing PFAS levels in drinking water is crucial, and local water utilities play a key role in ensuring transparency by making testing results available on their websites.
Reverse osmosis and activated carbon filters are popular choices for comprehensive filtration. Consider your household’s needs, plumbing age and taste preferences before choosing a system.
Thinking about Water Filter Installation?
Heard enough? Sure, you could go your whole life drinking tap water Sydney wide and never have a problem – but on the other hand you could play it safe by filtering tap water to remove contaminants and improve taste and order the best water filter installation known to man! In Australia that just so happens to be reverse osmosis water filter technology – and here are 4 reasons to get one fitted asap:
- No tap water is pure: Your water may look pure but isn’t necessarily. The pipes could be full of contaminants – a filter removes them at point-of-use.
- Save money: If you’re worried about contaminants and solved it by drinking bottled water, a filter will pay for itself quickly while reducing plastic waste.
- Bye-bye chlorine: Chlorine disinfects but isn’t designed for consumption! A filter removes chlorine before you drink it.
- Better taste: Say goodbye to chlorine or metallic tastes with a filter.
Why Some People Don’t Drink Tap Water
Despite Sydney’s high water quality some residents don’t drink tap water because:
- Chlorine taste or odour.
- Concerns about old pipes leaching metals.
- Worries about emerging contaminants like microplastics or PFAS.
- Concerns about synthetic chemicals like PFAS, which are used in various industrial and consumer products and are known for their persistence in the environment.
- Preference for bottled or filtered water for taste or perceived safety.
Education about water treatment and regular testing can help address these concerns.
Check Your Local Water Quality
Sydney Water publishes daily, quarterly and annual water quality reports which show testing results for various parameters including chlorine, heavy metals and microorganisms. You can find these reports on the Sydney Water website or ask for specific info about your suburb. For the most up to date info, contact your local water utility or check your water bill.
Acceptable contaminant concentrations in drinking water are measured in micrograms per litre (µg/L).
Resources and Contact Info
If you have concerns about your drinking water or want to learn more about the Australian Drinking Water Guidelines there are many resources to help you.
The National Health and Medical Research Council (NHMRC) website is a good place to start. It has info on the ADWG and other health related topics. The Australian Government Department of Health website also has useful info on drinking water quality and public health.
For specific info about your local water supply, your local water utility is the best source. They can tell you about the quality of your drinking water and any incidents that may affect it. You can find their contact info on your water bill or by contacting your local council.
Here are the contact numbers:
By using these resources you can stay informed about your drinking water and make sure it meets the Australian Drinking Water Guidelines.
Whether you live in older suburbs like Double Bay, Birchgrove and Lane Cove or newer estates of Greenacre, Wahroonga or Gymea Bay – old pipes to your house and contaminants are a real issue. If you’re concerned about your water, did you know Rapid Service Plumbing can get the latest water filter technology installed at your place this week? Don’t take any chances and call our friendly team of Sydney plumbers today.
by Prapti | Oct 19, 2024
Let’s talk about water leaks. Seems like just a minor inconvenience when you think about it, no? But it’s not. Did you know that water damage accounts for 24% of QBE’s home insurance claims, with the average claim at $5,000 and severe cases exceeding $500,000? That’s a staggering amount spent on fixing water leaks!
Water leaks can be more than just an inconvenience—they can evolve into major emergencies that risk damaging your property, disrupting your daily life, and even putting your health and safety at risk. Which is why identifying them as the right ones is extremely important. And that’s exactly what we’ll help you with today.
In this blog, we will explore the various scenarios where water leak detection is considered an emergency and why immediate action is necessary.
1. Water Leaks
Not every leak is an emergency, but the moment you notice signs of a severe leak, it’s time to call an emergency plumber. Even silent leaks can cause extensive damage before you’re aware of them. Water damage can affect your home’s structure, promote mould and mildew growth (leading to serious health problems), and even create fire hazards by reaching electrical wiring. Catching leaks early can save you both money and prevent larger issues down the line.
2. Water Stains
Water stains on your ceiling may seem minor but indicate a leak that’s been ongoing for some time. This means the water has already saturated the ceiling or floor, which could lead to significant structural damage. If you’re concerned, contact a toilet plumbing company in Sydney to assess the extent of the issue.
3. Damaged or Burst Pipes
A burst or severely damaged pipe can cause significant flooding in a short time. This not only threatens your home’s structure but also your wallet if not dealt with quickly. Turn off the main water supply and call a plumber immediately. Burst pipes are particularly common in winter when freezing temperatures cause them to crack. Fun fact: QBE says 1 in 5 Aussies (21%) don’t know where their water main is, and worryingly, 1 in 5 (18%) also don’t know how to turn it off. Our advice? Know the location and functioning of your main supply to avoid any regrets later.
4. Low Water Pressure

Low water pressure could indicate pipe damage, especially if it affects multiple faucets. While a clogged aerator might be a simple fix, consistent low pressure suggests a deeper problem that requires a plumber’s attention, as it might be related to a malfunctioning valve.
5. Overflowing Toilet
An overflowing toilet is a messy problem that often requires immediate attention. If a plunger doesn’t solve the issue, shut off the water behind the toilet and call a plumbing services company in Sydney, especially if the overflow persists.
6. Clogged Drains
Clogs are inevitable, but when they lead to slow drainage, bubbling water, or water backing up into other areas of the house, it’s time to call a plumber. Tree roots and other unknown blockages may be to blame, and professional intervention may be needed.
7. Backed-Up Sewage
A backed-up sewer line is a health hazard and a significant plumbing emergency. If you notice water backing up in multiple drains or smell sewage in your home, call for emergency help right away to avoid airborne contaminants that could make you and your family sick.
8. Loss of Water
A sudden loss of water might not seem as dangerous as other plumbing issues, but it’s still a major inconvenience. Without water, basic household tasks become impossible. If you can’t resolve the issue with a simple fix, it’s time to call a plumber.
When Not to Call an Emergency Plumber
Some issues, like minor leaks or clogs, can often wait until normal business hours. If the problem isn’t causing immediate damage, and you can manage a temporary fix, you can save money by holding off on an emergency call. For example, dripping faucets, slow drainage, or clogged toilets (if you have another bathroom) might not require urgent attention.
In Conclusion
Water leaks may not always be obvious, but when they become visible or cause significant issues, they should be treated as emergencies. Ignoring even small leaks can lead to bigger issues like structural damage, mould growth, electrical hazards, and health risks. If you suspect a leak, act fast and seek professional help to protect your property and avoid costly repairs.
Recognising when water leak detection is an emergency allows you to take swift action and safeguard your home or business effectively. Stay aware and stay protected!
by Prapti | Oct 19, 2024
Did you know that about 5 million households rely on natural gas for their daily needs? The Australian Government, Department of Industry, Science, and Resources says that. Since so many of us use gas, it is also important to know when it may get dangerous, which happens in case of a gas leak.
Dealing with a gas leak is a frightening scenario that can happen without warning. Gas leaks, whether inside or outside your home, pose significant risks to your property, environment, and, most importantly, your safety. The potential dangers range from fire hazards to carbon monoxide poisoning, making it essential to know exactly how to respond.
In this detailed guide, we’ll walk you through the signs of a gas leak and important safety measures you should take if you ever suspect a gas leak outside your home.
What Are The Signs Of A Gas Leak?
Before taking action, it’s crucial to identify a gas leak when it happens. Gas leaks are often invisible and may not be immediately obvious, but there are a few clear indicators that should alert you:
- Distinct Smell of Rotten Eggs
- Hissing or Whistling Sounds
- Dead or Discoloured Vegetation
- Bubbling Water or Dirt Blowing Up
If you notice any of these signs, treat the situation with extreme caution and proceed to the following safety measures.

Safety Measures For Gas Leaks
1. Evacuate the Area Immediately
After detecting a leak, it’s critical to evacuate the area calmly but quickly. Inform your family members, neighbours, and anyone nearby to evacuate as well. Ensure that children, pets, and elderly individuals are safely removed from the area and avoid actions that could create sparks or ignite the gas, such as starting your car if it’s near the leak.
2. Avoid Any Flames or Sparks
Once you’ve detected a gas leak, immediately eliminate any sources of ignition. This includes:
- Do not use open flames, such as matches or lighters.
- Avoid turning on or off any electrical appliances or light switches.
- Steering clear of starting your car if it’s parked near the suspected leak.
- Refraining from using mobile phones, flashlights, or other devices that may create sparks.
Even a small spark can trigger a gas explosion in an environment with a high concentration of gas.
3. Do Not Attempt to Fix the Leak
One of the biggest mistakes people make is attempting to repair a gas leak themselves. Unless you’re a trained professional, never attempt to locate the exact source of the leak or fix it. Gas leaks require specialised equipment and knowledge to handle safely. Leave this job to the experts.
4. Turn Off the Gas Supply (If Safe)
If you are familiar with the gas shutoff valve for your home, and it’s far from the leak, you can attempt to turn off the gas supply. Most homes have a shutoff valve near the gas meter. Only do this if it’s safe to approach the shutoff valve without being near the leak.
If you’re unsure how to shut off your gas or the valve is close to the leak, do not attempt it. Instead, leave this task to trained professionals.
5. Contact Emergency Services Immediately
Once you’ve evacuated the area, your next step is to contact your local fire department or report the leak to your gas company’s emergency line. Provide them with all the necessary details and stay on the line until the authorities tell you it’s safe to hang up. They may offer additional instructions to follow before help arrives.
6. Don’t Re-Enter The Area Until It’s Safe
After reporting the gas leak, do not re-enter the area until professionals have inspected the site and given the all-clear. Gas technicians and emergency responders will use specialised equipment to identify the leak’s source and repair it safely.
How To Prevent Gas Leaks?
While gas leaks are sometimes unavoidable due to ageing infrastructure or natural wear and tear, there are preventative measures you can take to reduce the risk:
- Schedule regular gas line inspections
- Know your gas shutoff valve
- Install carbon monoxide detectors
- Educate your family
- Hire a plumbing service to check for any gas issues
To Wrap It Up
Gas leaks are a serious matter that requires immediate action. By recognising the signs, and staying informed and prepared, you can reduce the risks associated with gas leaks and ensure a safe resolution to the problem.
In need of a technician to check for gas leaks, or other plumbing issues, like tap replacement in Sydney? Say hello to Rapid Service Plumbing, the ultimate solution to all your plumbing needs. Whether it’s a gas leak that needs to be addressed or a water leak that is bothering you, we do all this and more perfectly at the most amazing rates. Hire us to see for yourself!
by Prapti | Aug 5, 2024
Selecting the ideal electric hot water system for your house is crucial to guaranteeing cost-effectiveness, comfort, and efficiency. It might be difficult to decide which system best meets your household’s demands when there are so many options available. An electric water heater buying guide will help you understand the important factors to consider when choosing an electric hot water system.
1. Assess Your Hot Water Usage
Determine how much hot water is used in your home as a starting point for selecting the best electric hot water system. Consider your family’s hot water requirements by counting how many individuals live in your house and their regular schedules. Larger systems are usually needed in households with more members to provide a steady hot water supply. Consider high consumption periods as well. A bigger capacity system is required if you plan on taking many showers, doing laundry, and cleaning dishes simultaneously.
2. Types of Electric Hot Water Systems
Electric hot water systems have three primary types: heat pump systems, continuous flow (tankless) systems, and storage tank systems. Each type has benefits and drawbacks.
● Storage Tank Systems
These systems heat and store a large volume of hot water at a set temperature in a tank. They deliver hot water instantly, making them perfect for homes with high hot water demands. However, they may require more energy because the water in the tank is constantly heated, even when not in use.
● Continuous Flow (Tankless) Systems
A storage tank is no longer required because these systems heat water as needed. Because they only heat water as necessary, they utilise less energy. However, their flow rate may be limited, meaning simultaneous use of multiple hot water outlets can reduce water temperature.
● Heat Pump Systems
These systems heat water by moving heat from the ground or the air using electricity. They are quite ecologically friendly and energy efficient. However, installing them can be more costly, and they might not be suitable in every climate.
3. Energy Efficiency
Energy efficiency is an essential consideration when selecting an electric hot water system. Systems with higher efficiency can considerably reduce energy costs and environmental impact. Look for energy-efficient solutions and consider the long-term cost savings they provide. Storage tank systems are the least energy-efficient, whereas continuous flow and heat pump systems are typically the most efficient.
4. Installation and Space Requirements
Your choice of selecting the optimal hot water system for your home may be influenced by the installation and space constraints. Smaller homes may be unable to accommodate storage tank systems because of the tank’s large area requirements. Continuous flow systems can be put in smaller locations since they are more compact. Space is also needed for the heat pump systems and any related equipment. Make sure that installing the system of your choice in your house will not require any major adjustments or inconveniences.
5. Cost Considerations
The cost of an electric hot water system includes the initial purchase price, installation costs, and ongoing operating expenses. While heat pump systems may have higher upfront costs, their energy efficiency can lead to substantial long-term savings. Continuous flow systems are typically mid-range in cost, while storage tank systems are usually the most affordable initially but may incur higher operating costs due to energy consumption.
6. Durability and Maintenance
Take the hot water system’s longevity and maintenance needs into consideration. Over time, systems with longer warranties and fewer maintenance requirements may offer superior value. Heat pump systems often require less maintenance and have longer lifespans than storage tank and continuous flow systems. Routine maintenance, such as descaling continuous flow systems or flushing the tank in storage systems, can increase your hot water system’s lifespan.
7. Environmental Impact
You should consider your hot water system’s environmental impact, particularly if you want to lessen your carbon footprint. Heat pump systems employ renewable energy sources and emit fewer greenhouse gases, making them the most environmentally responsible choice. Continuous flow systems are also an excellent option because they minimise energy waste by heating water only when needed. Storage tank systems have the highest environmental impact due to continuous heating and energy consumption.
Wrap Up
Several aspects must be carefully considered when selecting an electric hot water system for your home, including energy efficiency, water consumption, installation requirements, cost, durability, and environmental impact. You may choose the best fit for your house through a needs analysis and understanding of the various system varieties. Purchasing the appropriate hot water system guarantees comfort and convenience and helps save energy and preserve the environment. If you are looking to fit an electric hot water system in Sydney. Give a call to Rapid Service Plumbing to fulfil all your plumbing needs at the most affordable rates!
by Prapti | Aug 2, 2024
Ensuring your heat pump runs well as winter approaches is essential to keeping your house warm and cosy without going over budget on energy bills. In this blog, we will give you some heat pump performance tips to get the most out of your heat pump in the cold winter months.
Understanding Heat Pump Basics
A heat pump transfers heat into your house from the outside air. Heat pumps are extremely energy-efficient because they transport heat rather than producing it as conventional heating systems do. Extreme cold, however, may pose a challenge to their effectiveness. Use these optimization suggestions to ensure your heat pump performs at its peak.
1. Regular Maintenance
Schedule Professional Inspections
Get a professional inspection for your heat pump before winter begins. Frequent maintenance inspections can find and fix any problems like electrical malfunctions, worn-out components, and refrigerant leakage. A yearly professional tune-up guarantees that your system operates at peak performance all season.
Clean or Replace Filters
Dirty filters can obstruct airflow, reducing the winter heat pump efficiency. Clean or replace filters every month during winter to maintain optimal airflow and air quality.
2. Optimise Thermostat Settings
Use a Programmable Thermostat
A programmable thermostat is an efficient way to control the temperature in your house. Set the temperature lower when you are not at home or asleep and higher when you are awake. This reduces the pressure on your heat pump and saves electricity.
Avoid Frequent Adjustments
Your heat pump’s effectiveness may decrease if the thermostat is adjusted frequently. Once you have chosen a comfortable temperature, let the system hold it.
3. Improve Home Insulation
Seal Drafts
Check for drafts around your house’s windows, doors, and other openings. Use caulking or weatherstripping to close these spaces and keep warm air from exiting and cold air from entering.
Insulate Your Home
It will be easier for your heat pump to maintain a pleasant temperature if your walls, attic, and floors are properly insulated. Proper insulation can dramatically reduce heat loss. To increase the thermal efficiency of your house, think about replacing or adding insulation.
4. Enhance Airflow
Keep Vents and Registers Clear
Ensure all vents and registers are free from obstructions like furniture, rugs, or curtains. Unobstructed airflow allows your heat pump to distribute warm air more effectively throughout your home.
Use Ceiling Fans
A ceiling fan can help disperse heated air more uniformly. To force warm air down from the ceiling, set it to run slowly in a clockwise direction.
5. Defrost Function and Outdoor Unit Care
Monitor the Defrost Cycle
Heat pumps have a defrost cycle to avoid frost accumulation on the exterior unit. Verify that this feature is operating as intended. If you see a lot of frost, it can be a sign of an issue that requires expert care.
Clear Snow and Debris
Ensure no snow, ice, or debris is around your outside unit. Enough ventilation is ensured, and the unit is kept from overworking when there is clear space.
6. Supplemental Heating
Use Backup Heat Wisely
Many heat pumps have a supplemental heating option, such as electric resistance heaters. Use this backup heat sparingly, as it is less efficient than the heat pump. Only rely on it during extremely cold periods when the heat pump struggles to maintain the desired temperature.
7. Energy-Saving Habits
Dress Warmly
Layering blankets and wearing warmer clothing can help you feel more at ease in colder interior temperatures, lightening the strain on your heat pump.
Limit Heat Loss
Close the curtains and blinds at night to prevent heat loss through the windows. During the day, leave them open to let natural light warm your house.
8. Upgrading Your Heat Pump
Consider a Cold-Climate Heat Pump
If you live in an area with bitterly cold winters, consider upgrading to a cold-climate heat pump. These versions are made to function well, even in chilly environments.
Look for ENERGY STAR Certification
Make sure the heat pump you choose is an ENERGY STAR-certified model. These units can reduce heating expenses and adhere to stringent energy efficiency regulations.
Wrap Up
It takes a mix of routine maintenance, smart thermostat settings, better insulation in your house, increased airflow, and energy-saving behaviours to maximise the effectiveness of your heat pump throughout the winter. Following these instructions ensures your heat pump runs well throughout the winter, keeping your house warm and your energy costs under control. By putting time and effort into these habits, you can prolong the life of your heat pump and make wintertime living more comfortable and economical. If you need an emergency plumber in Sydney, check out Rapid Service Plumbing for all your expert plumbing needs, including electric hot water service.