A leaking shower is easy to ignore at first. A slow drip from the showerhead, a small damp patch near the base, water that takes a little longer to dry out than it should. The problem is that showers are one of the most common sources of hidden water damage in Australian homes, and what starts as a minor leak can quietly cause significant structural damage over months.
A dripping tap or showerhead can waste up to 200 litres of water a day. A failing shower base can let water seep into subfloors, wall cavities, and the ceiling below for months before it becomes visible.
The right fix depends entirely on where the leak is coming from. This guide covers both types: showerhead and tap leaks that are often DIY-fixable, and base, screen, and tile leaks that usually need professional attention.
Two Types of Shower Leak (and Why It Matters)
Before reaching for any tools, it helps to spend a minute working out which type of leak you’re dealing with. The fix for one has nothing to do with the fix for the other.
| Leak Location | Likely Cause | DIY or Pro? |
| Showerhead dripping during use | Worn washer or O-ring, loose connection | DIY: straightforward |
| Showerhead dripping when water is off | Faulty cartridge in the valve | DIY possible, but often needs a plumber |
| Around the tap handle during use | Worn O-ring or packing on the stem | DIY possible on older taps |
| Shower base or floor | Failed waterproof membrane, cracked grout | Licensed pro required |
| Shower screen edges or corners | Deteriorated silicone seal | DIY: reseal with bathroom silicone |
| Grout lines on walls or floor | Failed grout, possible membrane issue | DIY if surface only, pro if deep |
| Damp wall or ceiling near shower | Concealed leak behind tiles | Licensed pro required |
If you’re not sure which type applies, run the shower for a few minutes, turn it off completely, then watch carefully. Water still dripping from the head after it’s fully off points to an internal valve issue. Water appearing at the base, around the screen, or on an adjacent wall points to a structural or waterproofing problem.
How to Fix a Leaking Shower Head
Most showerhead leaks fall into one of three categories, and two of them are straightforward home repairs.
Loose Connection or Worn Thread Tape
The simplest cause is a loose connection where the showerhead screws onto the shower arm. If the head wobbles or you can turn it by hand, that’s likely where the water is escaping.
The fix: wrap fresh plumber’s thread tape (PTFE tape) around the threads of the shower arm, then screw the showerhead back on firmly. Wrap four to five layers clockwise as you face the threads, pressing it down as you go so it adheres. When the head screws on (also clockwise), the tape tightens against the threads and creates a seal. Hand-tight plus a small final turn with a cloth-wrapped wrench is enough. Overtightening can crack the fitting.
Turn the water back on and check for drips at the connection point.
Worn Washer or O-ring
If the connection is tight but water is still dripping from the head during use, a worn washer or O-ring inside the showerhead connector is usually the cause. These small rubber components create the seal that stops water escaping. Over time they dry out, flatten, or crack.
- Turn off the water supply to the shower at the isolation valve or main shutoff.
- Unscrew the showerhead from the arm by hand, or with a cloth-wrapped wrench if it’s firm.
- Look inside the threaded connector on the showerhead. You’ll see a small rubber washer seated inside.
- Pry it out carefully with a flathead screwdriver. Note the size and take it to a hardware store to match it. Standard shower washers are typically half an inch and cost a couple of dollars.
- Seat the new washer firmly in place. If there’s an O-ring around the outside of the fitting, replace that too while you’re at it.
- Reapply thread tape to the arm, reattach the head, and test.
This fix takes around 15 minutes and costs almost nothing.
Shower Head Dripping When the Water Is Off
If water continues dripping from the showerhead after the tap is fully turned off, the problem isn’t the showerhead itself. It’s the cartridge inside the shower valve.
The cartridge is the internal component that controls water flow. When you turn the handle off, the cartridge should form a complete seal and stop all water movement. When it wears out, water can seep past it and trickle out of the showerhead even when the tap is in the off position. It doesn’t improve with time. If anything, the drip gradually worsens as the cartridge degrades further.
Replacing a cartridge involves removing the tap handle, extracting the old cartridge with pliers or a cartridge puller, and fitting an identical replacement. Getting the right part is critical: cartridges are brand and model specific. Bring the old one to a hardware store to match it exactly. If the orientation is wrong on reinstallation, the hot and cold positions will be reversed.
For mixer taps in particular, cartridge replacement can be straightforward if you’re comfortable with basic plumbing. For older two-handle tap setups, it’s usually worth having a plumber look at it, particularly if the valve seat (the surface the washer presses against) is also worn. Our guide on fixing a leaking tap covers the process in detail for both tap types.
How to Fix a Leaking Shower Tap
Shower taps come in two main configurations: mixer taps (single handle controlling both hot and cold) and separate hot and cold taps. The internal components differ, and so do the repairs.
Mixer taps use a ceramic cartridge to control flow and temperature. When a mixer tap leaks at the handle or lets water through when turned off, the cartridge is almost always the cause. Replacement is generally a DIY-capable job, though getting the correct cartridge for your brand is essential.
Separate hot and cold taps typically use a rubber washer pressed against a valve seat by a stem mechanism. Washer replacement is a common DIY repair. The washer sits at the bottom of the stem and wears flat or develops a groove over time. Replacing it is straightforward on most tap types and the parts are widely available.
One important note for NSW homeowners: replacing a washer, O-ring, or cartridge is considered routine tap maintenance and can be carried out by the homeowner. However, any work that involves modifying the water supply, replacing valve bodies, or working on pipes behind the wall does require a licensed plumber under NSW plumbing regulations. If the tap itself is beyond a simple washer or cartridge swap, our tap repair service covers the full range of shower tap repairs across Sydney and Melbourne.
Leaking Shower Base, Screen, or Tiles
This is where a leaking shower gets more serious. Water escaping through the base, screen, or tiled walls isn’t just a surface problem. It can saturate subfloors, rot structural timber, and promote mould growth inside wall cavities, often for months before any visible sign appears.
Failed Silicone Seals
The silicone bead running along the junction between the shower screen and tiles, or between the shower base and wall tiles, is designed to flex with minor movement and keep water inside the wet area. Over time it discolours, pulls away from the surface, or develops cracks that let water through.
Resealing is a DIY job if the silicone is the only issue and the surfaces beneath are sound. Remove all the old silicone completely using a utility knife and silicone remover, clean the joint thoroughly, and allow it to dry fully before applying fresh bathroom-grade silicone. A bead that’s applied onto damp or poorly cleaned surfaces won’t adhere properly and will fail quickly.
Cracked or Failing Grout
Grout in shower walls and floors is porous and degrades over time, particularly in areas of regular flexing or movement. Hairline cracks in grout lines allow water to penetrate behind the tiles. If the waterproof membrane beneath the tiles is intact, regrouting may be sufficient to resolve the leak. If the membrane has been compromised, surface regrouting is a temporary fix at best. Water will continue seeping behind the tiles.
A good test: after the shower has been completely dry for 24 hours, run it for 10 minutes then check for damp patches on adjacent walls, soft spots underfoot, or water appearing outside the wet area. If any of these are present, the issue likely goes deeper than the grout surface.
Failed Waterproof Membrane
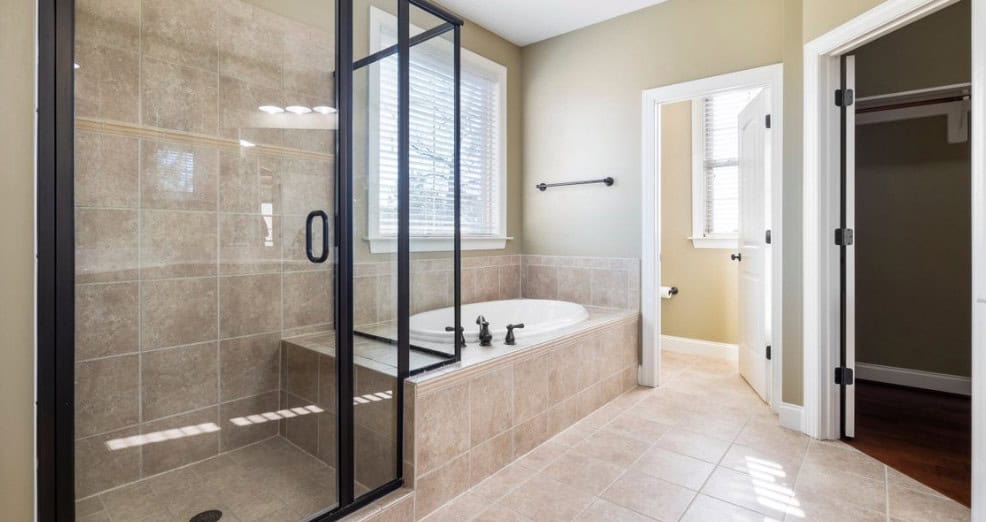
Every tiled shower in Australia is required to have a waterproof membrane installed beneath the tiles, in compliance with AS 3740 (the Australian Standard for waterproofing of domestic wet areas). When this membrane fails (through age, movement, poor original installation, or physical damage) water can pass through the tile and grout layer and penetrate directly into the substrate.
This cannot be fixed from the surface. Applying sealant over grout or retiling on top of a failed membrane won’t stop the water. It will continue moving through the membrane layer regardless of what’s done above it. The only lasting fix involves removing the tiles, stripping and replacing the membrane, and retiling. This is work for a licensed waterproofer or bathroom plumber, and any wet area waterproofing in Australia must comply with AS 3740 to be valid.
Minor resealing (grout and silicone) on a standard shower typically runs $150 to $500 in Sydney. Full membrane replacement, depending on shower size and tile complexity, can range from $1,000 to $4,000 or more. Our bathroom plumbing team carries out wet area waterproofing repairs across Sydney and Melbourne, including membrane replacement compliant with AS 3740.
Leaking Shower Screen
Water escaping from the edges or bottom channel of a shower screen is usually a seal issue. The rubber seal running along the bottom of the screen door, and the silicone beading around the frame, deteriorate over time and allow water to escape during use.
Door seals can often be replaced without professional help. Most are push-fit or held by a small clip, and replacement seals are available from bathroom suppliers and hardware stores. For the silicone around the frame, remove the old bead completely and reseal as described above.
If the screen itself has shifted on its base or the frame has pulled away from the wall, that’s worth having a plumber look at, as water may already have found its way behind the wall.
Warning Signs the Leak Is Causing Hidden Damage
A shower leak doesn’t always show itself in the shower. By the time it becomes visible elsewhere, water has usually been moving through the structure for some time.
Damp patches or paint bubbling on an adjacent wall. If the wall next to or behind the shower is showing moisture, water is tracking through from the wet area. This is one of the clearest signs of membrane failure or a significant grout or screen leak.
Soft or spongy floor near the shower base. This indicates water has reached the subfloor and begun to saturate or rot the underlying material. It needs prompt attention. The longer it’s left, the more structural timber is affected.
Mould appearing on surfaces outside the shower. Mould inside the shower is common and manageable. Mould on adjacent walls, skirting boards, or the ceiling below is a sign of ongoing moisture movement through the structure.
A ceiling stain in the room below. If your shower is on an upper floor and you notice a stain or soft patch on the ceiling below, water is passing through the floor structure. It means water has already travelled through the floor and is affecting the room beneath.
Any of the above signs warrants prompt investigation. A slow but persistent shower leak can also show up less visibly as an unexplained rise in your water bill. According to Sydney Water’s water saving data, a dripping tap alone can waste up to 200 litres a day. If your bill has crept up and you can’t account for it, our spinning water meter guide walks through how to check whether a hidden leak is the cause.
When to Call a Plumber for a Leaking Shower
Some shower leaks are straightforward home maintenance. Others need a licensed plumber or waterproofer before the damage compounds.
Call a plumber if:
- The showerhead continues dripping after the tap is fully off and cartridge replacement hasn’t resolved it
- There’s water appearing at the base of the shower during use despite no obvious silicone failure
- Soft spots, damp walls, or a ceiling stain suggest water has reached the structure
- Regrouting or resealing hasn’t fixed a persistent leak after two or three dry-and-test cycles
- The same area keeps leaking shortly after each repair attempt
- You need any work carried out on pipes, valve bodies, or water supply connections behind the wall
If water has already reached the structure, get a licensed plumber in promptly rather than attempting further DIY repairs. Knowing when a leak becomes an emergency is useful context for making that call. You can verify any plumber’s licence through the licensed plumber check on Service NSW before booking.
Key Takeaways
- A dripping showerhead during use is usually a worn washer or loose connection. Usually a simple DIY fix.
- A showerhead dripping when the water is off points to a faulty cartridge inside the valve, not the head itself.
- Silicone seal failure around screens and bases is DIY-fixable if caught early and the membrane beneath is sound.
- Failed waterproofing membrane cannot be fixed from the surface. Tiles must come up and the membrane must be replaced.
- Damp walls, soft floors, and ceiling stains near a shower all indicate water is already moving through the structure.